Best Fertilizer for Monstera Adansonii | Fertilizing Guide

The Best Fertilizer for Monstera Adansonii
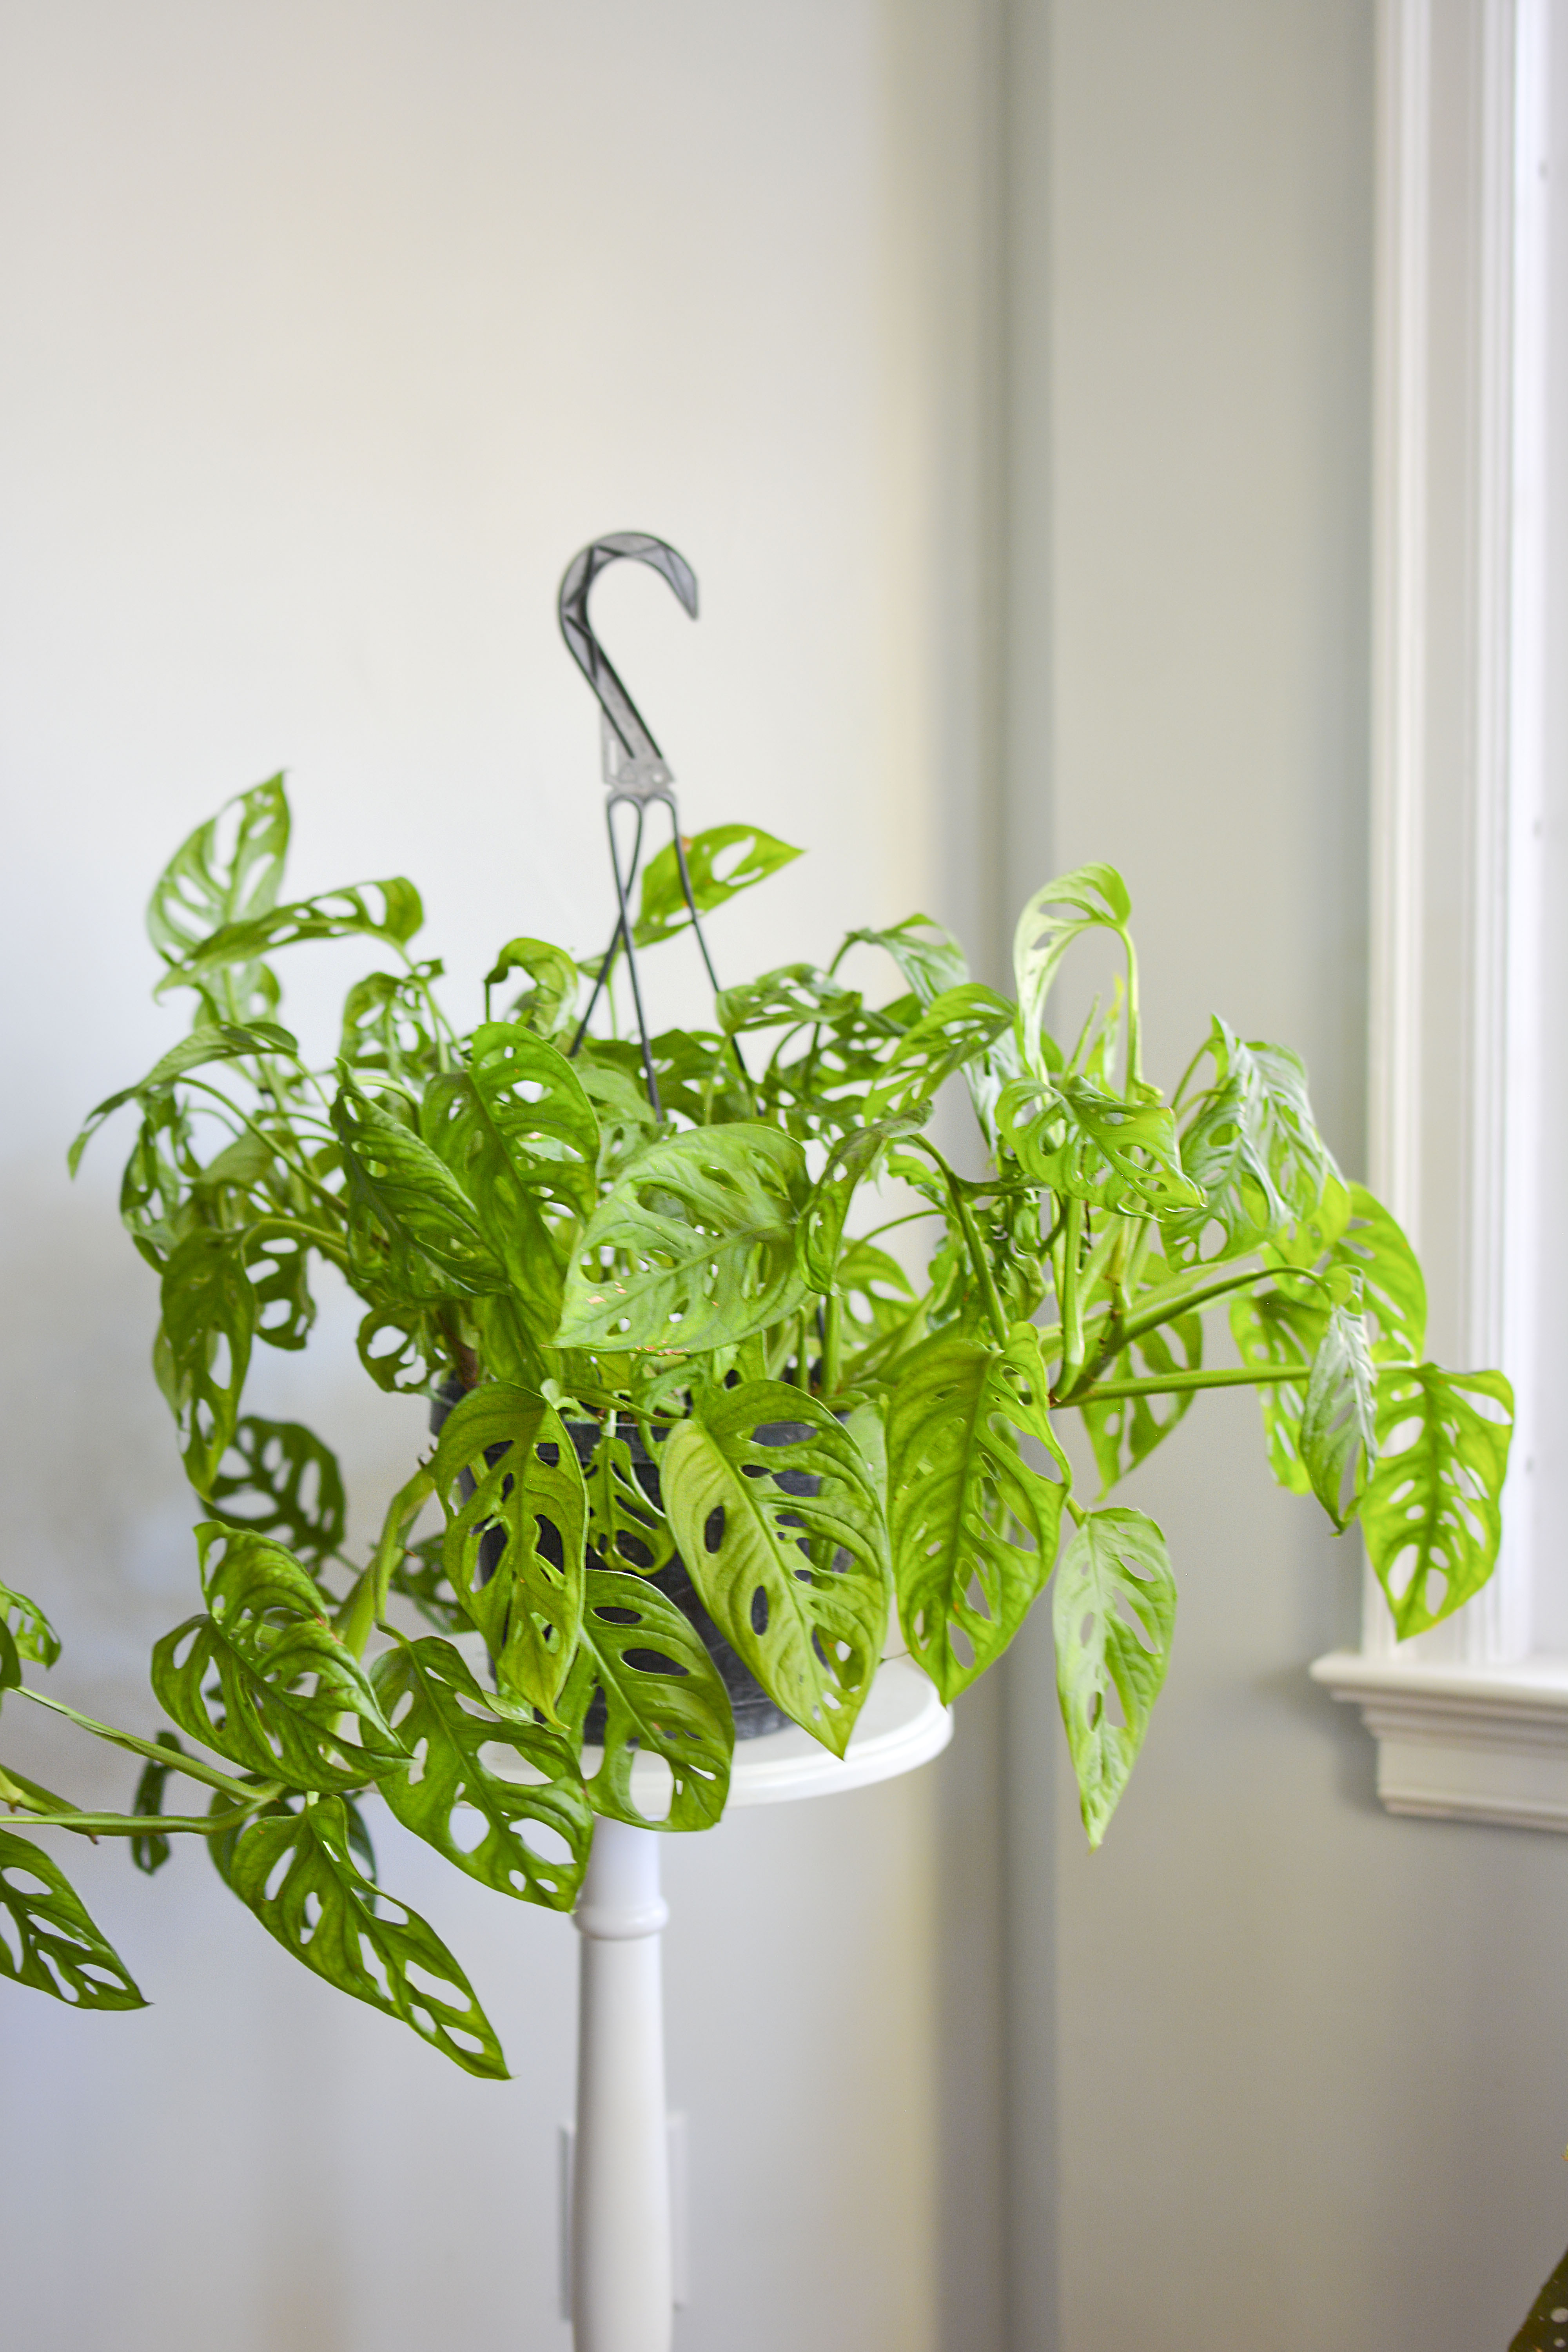
Monstera Adansonii is a gorgeous, fenestrated tropical plant that is also known as the Swiss cheese plant. Monsteras are popular indoor plants, loved by many all over the world.
Monstera Adansonii Characteristics
The Adansonii is a fast-growing vining plant that can reach up to 30 feet in length in its natural habitat, but it is typically grown as a potted plant indoors. Many do not reach 30 feet indoors, but with the right care I bet they could! They are one of many tropical plants that climb using aerial roots. These aerial roots allow them to climb any surface they choose, even buildings!
Although Monstera is easy to care for, it needs regular fertilization to meet its nutritional needs.
Monstera Adansonii is relatively easy to grow which makes it an awesome choice for beginner plant parents. It prefers bright, indirect light and moist soil. It is also relatively pest and disease resistant.
The most effective way to choose the best fertilizer for Monstera Adansonii is to gain a deeper understanding of fertilizers in general, and I can help you with that!
Let’s start with the different forms of fertilizers
Organic granular fertilizer: These fertilizers are slow-release, which means they release nutrients over time, preventing nutrient burn. A balanced fertilizer with an NPK ratio of 10-10-10 or 20-20-20 is a good option. Apply every 6-8 weeks during the growing season.
Slow-release fertilizer sticks: These pre-measured sticks are easy to use and provide a steady supply of nutrients for several months. Apply once every 2-3 months during the growing season.
Water-soluble or liquid fertilizer: These fertilizers are quick-acting and can be used to give your Monstera Adansonii a boost of nutrients. Dilute the fertilizer to half-strength and apply every 2-4 weeks during the growing season.
Compost or worm castings: These organic amendments provide a slow release of nutrients and improve soil health. Top-dress your Monstera adansonii with a layer of compost or worm castings every few months.
Here are some additional tips for fertilizing Monstera Adansonii:
- Do not fertilize at full strength during the winter when the plant is dormant.
- Fertilize less often if your Monstera Adansonii is young or pot-bound.
- Watch for signs of nutrient deficiency, such as yellowing leaves.
- Avoid over-fertilizing, as it can cause fertilizer burn.
What is NPK and why you need to know about it:
NPK stands for nitrogen (N), phosphorus (P), and potassium (K), which are the three primary macronutrients essential for plant growth.
These nutrients are often listed on fertilizer labels in a specific ratio, such as 10-10-10 or 20-20-20. The numbers represent the percentage of each nutrient in the fertilizer by weight.
- Nitrogen (N): Nitrogen is crucial for leaf growth and development. It promotes lush green foliage and helps plants absorb other nutrients.
- Phosphorus (P): Phosphorus is essential for root growth and development. It also plays a role in flower and fruit formation.
- Potassium (K): Potassium strengthens plant stems and roots, making them more resistant to diseases and environmental stresses. It also helps regulate water balance in plants.
The specific NPK ratio of a fertilizer depends on the type of plant you are growing and its stage of development. For instance, leafy greens like lettuce and kale require more nitrogen, while flowering plants like tomatoes and peppers need more phosphorus.
Here’s a general guideline for NPK ratios based on plant type:
- Leafy greens: 20-10-10 or 25-8-9
- Flowering plants: 10-20-10 or 12-24-12
- Fruiting plants: 15-15-15 or 17-17-17
- Fruit trees: 10-10-10 or 12-12-12
When selecting a fertilizer, consider the specific needs of your plants and the overall health of your soil. Always follow the application instructions on the fertilizer label to avoid over-fertilizing, which can damage plants.

Synthetic Fertilizers VS Organic Fertilizers
Synthetic and organic fertilizers are both used to provide plants with essential nutrients, but they differ in their origin, composition, and effects on the environment.
Origin
- Synthetic fertilizers: Also known as inorganic fertilizers, these are manufactured from chemicals and minerals. They are typically produced in industrial settings and involve chemical processes.
- Organic fertilizers: Derived from natural sources, such as plant and animal waste, compost, and manure. They are often produced through composting or other methods that involve the breakdown of organic materials.
Composition
- Synthetic fertilizers: Contain specific nutrients in precise ratios, typically nitrogen (N), phosphorus (P), and potassium (K). They are often concentrated and readily available for plant uptake.
- Organic fertilizers: Contain a variety of nutrients, including N, P, and K, but may also contain micronutrients and other beneficial compounds. They release nutrients slowly over time, as they are broken down by soil organisms.
Effects on the environment
- Synthetic fertilizers: Can have potential environmental impacts, such as nutrient runoff into waterways, which can lead to algal blooms and oxygen depletion. They may also contribute to soil acidification.
- Organic fertilizers: Generally considered more environmentally friendly as they promote soil health, improve soil structure, and increase microbial activity. They are less likely to cause nutrient runoff or soil acidification.
Suitability for different plants
- Synthetic fertilizers: Suitable for plants that require a quick boost of nutrients, especially during the growing season. They can be particularly effective for crops and fast-growing plants.
- Organic fertilizers: Suitable for plants that prefer a slow and steady release of nutrients and thrive in healthy soil conditions. They are often preferred for organic gardening and for plants that are sensitive to salt buildup.
Synthetic fertilizers offer a quick and concentrated source of nutrients, while organic fertilizers promote long-term soil health and provide a more gradual nutrient release.
The choice between synthetic and organic fertilizers depends on various factors, including plant type, soil conditions, environmental considerations, and personal preferences.
When is the best time to begin fertilizing your monstera? Now is a great time but if you want to wait to formulate a fertilizer plan you can wait until early spring when the plant is in active growth.
Different Fertilizer options
Balanced liquid fertilizer: A balanced liquid fertilizer with an NPK ratio of 10-10-10 or 20-20-20 is a good all-purpose fertilizer for Monstera adansonii. Dilute the fertilizer to half strength and apply it every 2-4 weeks during the growing season.
Fish emulsion fertilizer: Fish emulsion fertilizer is a natural and organic fertilizer that is rich in nitrogen and phosphorus. It is a good choice for Monstera adansonii that are showing signs of nutrient deficiency, such as yellowing leaves. Mix fish emulsion fertilizer with water according to the instructions on the label and apply it every 4-6 weeks during the growing season.
Slow-release granular fertilizer: Slow-release granular fertilizer is a convenient option that provides nutrients to your Monstera adansonii over time. The best time to apply slow-release granular fertilizer is every 3-6 months during the growing season.
Compost or worm castings: Compost and worm castings are organic amendments that provide a slow and steady release of nutrients to your Monstera adansonii. They also help to improve soil structure and drainage. Top-dress your Monstera adansonii with compost or worm castings every few months.
Here are some additional tips for fertilizing Monstera adansonii:
- Do not use a full dose of fertilizer on your Monstera adansonii during the winter months when it is no in active growth.
- Fertilize less often if your Monstera adansonii is young or pot-bound.
- Watch for signs of nutrient deficiency, such as yellowing or browning leaves, before fertilizing.

Liquid Fertilizer VS Granular Fertilizer
Liquid and granular fertilizers are both effective ways to provide plants with essential nutrients, but they have different properties and applications.
Liquid fertilizer
- Appearance and application: Liquid fertilizer is a concentrated solution of nutrients dissolved in water. It is typically applied through a hose attachment or watering can.
- Nutrient release: Liquid fertilizer provides nutrients quickly and efficiently, making it ideal for situations where a quick boost of nutrients is needed.
- Convenience: Liquid fertilizer is easy to apply and can be mixed with water to adjust the nutrient concentration.
- Shelf life: Liquid fertilizer typically has a shorter shelf life than granular fertilizer.
Granular fertilizer
- Appearance and application: Granular fertilizer is made up of small, dry pellets that contain concentrated nutrients. It is typically spread over the soil surface and watered in.
- Nutrient release: Granular fertilizer releases nutrients slowly over time, making it a good choice for long-term nutrient supply.
- Cost-effectiveness: Granular fertilizer is often more cost-effective than liquid fertilizer, especially when purchased in bulk.
- Storage: Granular fertilizer has a longer shelf life than liquid fertilizer.
Choosing the right fertilizer
The best type of fertilizer for your plants depends on several factors, including the type of plants, the time of year, and your personal preferences.
Here are some general guidelines:
- Use liquid fertilizer for plants that need a quick boost of nutrients or that are sensitive to salt buildup.
- Use granular fertilizer for plants that need a long-term supply of nutrients or that are not sensitive to salt buildup.
- Always follow the instructions on the fertilizer label to avoid over-fertilizing.
How to make your own Fertilizer
Making your own fertilizer is a great way to save money, reduce waste, and give your plants a boost of nutrients.
Compost tea: Compost tea is a nutrient-rich liquid made from compost and water. To make compost tea, simply steep compost in water for 24-48 hours. Strain the tea and dilute it with water before applying it to your plants.
Comfrey tea: Comfrey is a plant that is high in nitrogen, potassium, and phosphorus. To make comfrey tea, steep comfrey leaves in water for 24 hours. Dilute the tea with water before applying it to your plants.
Eggshell fertilizer: Eggshells are a good source of calcium, which is essential for healthy plant cell walls. To make eggshell fertilizer, crush eggshells into a fine powder and sprinkle them around your plants.
Coffee ground fertilizer: Coffee grounds are a good source of nitrogen, phosphorus, and potassium. To make coffee ground fertilizer, add coffee grounds to your compost pile or spread them around your plants.
Banana peel fertilizer: Banana peels are a good source of potassium and magnesium. To make banana peel fertilizer, bury banana peels in your soil or add them to your compost pile.
Fish emulsion fertilizer: Fish emulsion is a concentrated liquid fertilizer made from fish waste. It is a good source of nitrogen, phosphorus, and potassium. To use fish emulsion fertilizer, dilute it with water according to the instructions on the label.
Seaweed fertilizer: Seaweed is a good source of nitrogen, phosphorus, potassium, and trace minerals. To use seaweed fertilizer, soak seaweed in water for 24 hours and then dilute the solution with water before applying it to your plants.
When using homemade fertilizer, it is important to start with small amounts and gradually increase the amount as needed.
It is also important to watch for signs of nutrient burn, such as yellowing or browning of leaves. If you see signs of nutrient burn, reduce the amount of fertilizer you are using.
Here are some additional tips for making and using homemade fertilizer:
- Use only organic ingredients to avoid introducing harmful chemicals into your soil.
- Use composted materials whenever possible, as they are more readily absorbed by plants.
- Apply fertilizer regularly during the growing season, but be sure to follow the instructions on the label to avoid over-fertilizing.
- Water your plants thoroughly after applying fertilizer to help the nutrients reach the roots.
- Test your soil regularly to determine if it needs fertilizer.
Best Fertilizer for Monstera Adansonii
The best fertilizer for Monstera Adansonii is balanced and specifically formulated for foliage plants. It should have a high nitrogen content to encourage leaf growth, but also contain phosphorus and potassium for overall plant health. The fertilizer you choose can have a range in NPK but just make sure its higher in nitrogen.
Here are a few specific fertilizer recommendations:
- DynaGro Foliage Pro 9-3-6
- Alaska Fish Fertilizer
- Espoma Organic Monstera Food
- Dr. Earth Organic Liquid Fertilizer for Tropical Plants
- Worm Castings
You can also use a general-purpose houseplant fertilizer, but be sure to dilute it to half strength.
Here is a general fertilizing schedule for Monstera adansonii:
- Spring and summer: Fertilize every two weeks with a balanced fertilizer diluted to half strength.
- Fall and winter: Fertilize once a month with a balanced fertilizer diluted to half strength.
If you have recently repotted your Monstera adansonii, do not fertilize for at least a month. The new potting mix will contain enough nutrients to sustain your plant for that period of time.

How to Grow Monstera Adansonii:
Lighting
Monstera adansonii prefers bright, indirect light. Place it near a window, but avoid direct sunlight, which can scorch the leaves. If you don’t have a bright window, you can supplement it with a grow light.
Watering
Water your Monstera adansonii when the top inch of soil is dry to the touch. Water thoroughly until water runs out of the drainage holes. Do not let the plant sit in water, this can lead to root rot.
Humidity
Monstera adansonii likes humidity. Mist the leaves regularly, especially during the winter when the air is dry. You can also place the pot on a pebble tray filled with water or add in a humidifier for higher and consistent humidity.
Maintaining consistent humidity for houseplants is essential for their health, as many tropical and subtropical plants come from humid environments.
5 Ways to increase humidity around your houseplants:
- Grouping plants: Place your plants together to create a microclimate with higher humidity. As plants transpire, they release moisture into the surrounding air, increasing the overall humidity level.
- Pebble trays: Fill a shallow tray with pebbles or gravel and place your plants on top. Pour water into the tray until the pebbles are partially submerged. The water will evaporate, increasing humidity around the plants.
- Misting: Regularly mist your plants with a spray bottle filled with room-temperature water. Misting directly onto the leaves and around the plant will provide a quick boost of humidity.
- Humidifier: Invest in a room humidifier to increase the overall humidity level in your home. Place the humidifier near your plants to ensure they receive adequate moisture.
- Place plants in humid rooms: Consider placing your plants in naturally humid rooms, such as bathrooms or kitchens, where moisture is more prevalent.
Soil
Monstera adansonii prefers a well-draining potting mix. You can use a commercial potting mix made for tropical plants or make your own by mixing equal parts potting soil, perlite, and peat moss.
Pruning
Prune your Monstera adansonii to control its size and shape. You can also prune to remove any yellow or damaged leaves.
Pests and diseases
Monstera adansonii is relatively pest and disease resistant. However, it can be susceptible to mealybugs, spider mites, and scale insects. If you notice any pests, treat the plant with an insecticidal soap or neem oil.
Repotting
Repot your Monstera adansonii every 1-2 years, or when it outgrows its current pot. Choose a pot that is one size larger than the current pot and use a fresh potting mix.
Additional tips
- Provide your Monstera adansonii with a moss pole or trellis to help it climb.
- Wipe the leaves off with a damp cloth to remove dust.
- Keep your Monstera adansonii away from drafts and extreme temperatures.

Here are 10 interesting facts about monstera plants:
- Monstera plants are native to tropical rainforests in Central and South America. They are climbing vines that can grow up to 100 feet long in their natural habitat.
- Monstera plants are known for their large, heart-shaped leaves with fenestrations, or holes. The holes in the leaves are thought to help reduce wind resistance and allow sunlight to penetrate through the canopy to the lower leaves.
- Monstera plants are also known for their fruit, which is called a spathe. The spathe is a large, fleshy structure that encloses the flowers. The fruit is edible when it is fully ripe, and it has a flavor that has been described as a combination of pineapple, banana, and mango.
- Monstera plants are relatively easy to care for as houseplants. They prefer bright, indirect light, and they should be watered when the top inch of soil is dry to the touch.
- Monstera plants are not toxic to humans or pets. However, the leaves can irritate the skin and mouth if they are chewed on.
- Monstera plants are a popular symbol of good luck and prosperity. They are often given as gifts to represent new beginnings and fresh starts.
- Monstera plants have been used in traditional medicine for centuries. The leaves are said to have anti-inflammatory and antimicrobial properties.
- Monstera plants are a popular subject of art and photography. Their unique foliage and tropical origins make them a striking subject for creative expression.
- Monstera plants are a versatile addition to any home décor. They can be grown in pots, baskets, or hanging planters.
- Monstera plants are a symbol of resilience and adaptability. They can thrive in a variety of environments, from humid rainforests to dry apartments.
5 Easy to grow monstera varieties you might like:
- Monstera deliciosa (Swiss cheese plant): This is the most common and easiest to grow monstera variety. It has large, fenestrated leaves that can grow up to 3 feet long. Monstera deliciosa is a vining plant, so it needs a trellis or stake to climb.
- Monstera obliqua (Peruvian philodendron): This monstera variety is known for its unique, heart-shaped leaves with large fenestrations. It is a bit more difficult to care for than other monstera varieties, but it is still relatively easy to grow.
- Monstera siltepecana (Silver monstera): This monstera variety has silvery-green leaves with dark green veins. It is a slow-growing plant, but it is relatively easy to care for.
- Monstera standleyana (Shingle plant): This monstera variety has small, heart-shaped leaves with wavy edges. It is a slow-growing plant, but it is relatively easy to care for.
- Monstera acuminata (Five holes plant): This monstera variety has small, fenestrated leaves with five holes. It is a slow-growing plant, but it is relatively easy to care for.
Finding the best fertilizer for Monstera Adansonii and creating a good fertilizer schedule will ensure that your plant is getting enough nutrients. You will begin to see healthy growth on your plant such as more new leaves and bigger leaves. Healthy plants are more resistant to pest attacks and live a lot longer than plants that are not fertilized. Keeping your Monstera Adansonii fertilized properly will ensure a happy and healthy plant!
Happy Gardening!
2 responses to “Best Fertilizer for Monstera Adansonii | Fertilizing Guide”
Leave a Reply

Nestera Chicken Coop

Botanical Interest
Garden Tower Project
Vego Gardens

Botanical Interests
Amazon Favorites!

Hoselink
Web Stories


[…] Best Fertilizer for Monstera Adansonii […]
[…] Learn how to properly Fertilizer your Monstera Adansonii Here! […]