How to Grow Sweet Potatoes in your home garden
Sweet potatoes are a relatively easy vegetable to grow in home gardens, but they do require a long growing season of 85-120 days and warm weather, but you can easily get your Sweet Potatoes started indoors early if you have a short growing season where you live. I really enjoy starting Sweet Potato slips indoors to get them started. It’s a really fun process to watch. There are many ways to get your Sweet potatoes going so there’s no one right way for every gardener. Let’s break down all the ways you can grow Sweet Potatoes!

How to grow sweet potatoes:
Growing sweet potatoes in the ground is a relatively easy process that can provide you with a delicious and nutritious crop.
- Site Selection: Choose a sunny location with well-drained soil. Sweet potatoes thrive in warm, sunny conditions and require well-drained soil to prevent root rot.
- Soil Preparation: Prepare the soil by tilling or digging to a depth of 8-12 inches. Amend the soil with compost or aged manure to improve drainage and fertility. Aim for a soil pH between 5.5 and 6.8.
- Planting Timing: Plant your own sweet potato slips or tubers after the last spring frost and when the soil temperature has warmed to at least 60°F (15°C). This typically occurs in late spring or early summer, depending on your region.
- Planting Depth and Spacing: Plant sweet potato slips or tubers 4 inches deep and 12-18 inches apart. This spacing allows for adequate airflow and reduces overcrowding.
- Watering: Water the plants regularly, especially during hot, dry weather. Keep the soil moist but not soggy.
- Mulching: Apply a layer of organic mulch, such as straw or shredded leaves, around the plants to conserve moisture, suppress weeds, and regulate soil temperature.
- Fertilizing: Sweet potatoes are moderate feeders. Apply a balanced fertilizer with an N-P-K ratio of 1:1:1 or 1:2:1 at planting time and again 4-6 weeks later.
- Monitoring and Pest Control: Keep an eye out for common pests and diseases that can affect sweet potatoes, such as aphids, sweet potato whiteflies, and fungal diseases. Use organic pest control methods whenever possible.
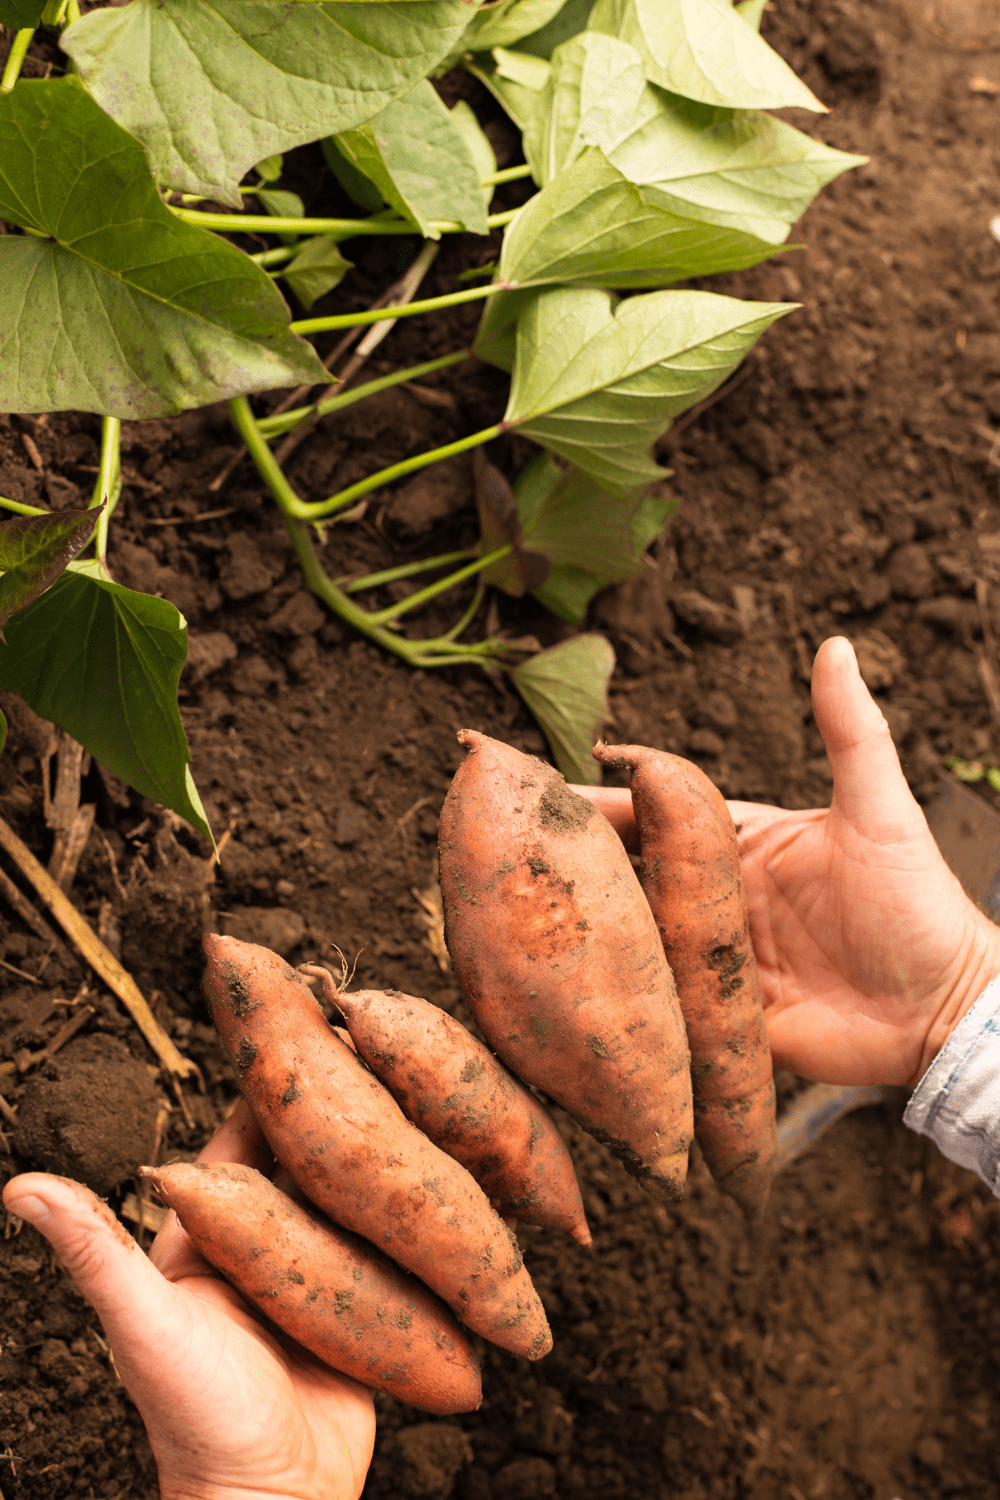
- Harvesting: Sweet potatoes are typically ready to harvest in 100-120 days. The leaves of the plants will start to yellow when the sweet potatoes are ready to harvest. Gently dig up the sweet potatoes and take care not to damage the tubers.
- Curing: After harvesting, allow the sweet potatoes to cure in a warm, humid location for 7-10 days. This curing process helps develop flavor and extend storage life.
Tips for Successful Sweet Potato Cultivation:
- Choose disease-free and healthy sweet potato slips or tubers.
- Rotate your planting location each year to prevent soil-borne diseases.
- Water consistently but avoid overwatering to prevent root rot.
- Monitor soil moisture levels and adjust watering frequency based on weather conditions.
- Remove weeds regularly to prevent competition for nutrients and sunlight.
- Inspect plants regularly for signs of pests or diseases and take appropriate action.
More Posts you May be Interested In!
- The Best Potting Soil For Growing Peppers in Pots
- Raised Bed Gardening for Beginners
- How to Start a Vegetable Garden

Sweet Potato History and Facts
Sweet potatoes, with their starchy tubers and distinctive orange flesh, have a rich and fascinating history that spans continents and thousands of years. They are believed to have originated in Central or South America, where they were cultivated by indigenous peoples for over 5,000 years. Evidence suggests that sweet potatoes were domesticated in the Amazon region long before the arrival of Europeans.
Sweet potatoes are a healthy and nutritious vegetable that is packed with vitamins, minerals, and antioxidants. They are a good source of beta-carotene, which is converted to vitamin A in the body. Vitamin A is essential for vision, immunity, and cell growth. Sweet potatoes are also a good source of vitamin C, potassium, and fiber.
Overall, sweet potatoes are a healthy and nutritious food that can offer a variety of health benefits. You can find this tuberous root at just about any grocery store. I suggest buying a few pounds of sweet potatoes from a company that specializes in “seed” sweet potatoes for growing. However, you can purchase large sweet potatoes from the grocery store and even your local garden center.
Ways to incorporate sweet potatoes into your diet:
- Baked sweet potatoes
- Sweet Potato Bread
- Sweet Potato Cookies
- Sweet Potato Biscuits
- Sweet potato fries
- Sweet potato soup
- Sweet potato pie
- Sweet potato muffins

How to Grow Sweet Potato Slips
Sweet Potato slips are young plants that are grown from sweet potato cuttings. They are the rooted sprouts that grow from an actual mature sweet potato. They are used to grow new sweet potato plants.
To grow sweet potato slips, you can cut a sweet potato into 2-3 inch pieces and let them sit in a warm, moist place until they start to sprout roots. You can also start slips by planting a whole sweet potato in a pot of soil. The sweet potato will eventually sprout roots and shoots, and the shoots can be transplanted directly into the garden or you can put them in water or potting mix until your ready to plant them outside.
Growing sweet potato slips is a simple process that can be done at home.
Here are two methods you can use:
Method 1: Starting Sweet Potato Slips in Water (My Favorite way to grow slips)
Materials:
- A sweet potato
- Toothpicks
- A jar or glass
- Water
- A sunny window or under grow lights
Instructions:
- Choose a healthy, organic sweet potato that is free from blemishes.
- Insert three or four toothpicks into the sweet potato, evenly spaced around the middle. The toothpicks should hold the sweet potato about halfway out of the water.
- Place the sweet potato in a jar or glass filled with water. The water should reach about halfway up the sweet potato.
- Position the jar or glass in a sunny window or under grow lights.
- Change the water every few days to keep it fresh.
- In a few weeks, you will see sprouts growing from the top of the sweet potato. These are called slips.
- Once the slips are 4-6 inches long, you can gently break them off the sweet potato and plant them in the ground.
Method 2: Starting Sweet Potato Slips in Soil
Materials:
- A sweet potato
- A shallow container with drainage holes
- Potting mix
- Water
- A sunny window or under grow lights
Instructions:
- Choose a healthy, organic sweet potato that is free from blemishes.
- Place the sweet potato in a shallow container with drainage holes.
- Fill the container with potting mix, leaving about an inch of space at the top.
- Water the potting mix until it is evenly moist.
- Place the container in a sunny window or under grow lights.
- Keep the potting mix moist but not soggy.
- In a few weeks, you will see sprouts growing from the top of the sweet potato. These are called slips.
- Once the slips are 4-6 inches long, you can gently remove them from the potting mix and plant them in the ground.
Additional Tips:
- Sweet potato slips are ready to plant when the soil temperature has warmed to at least 60 degrees Fahrenheit.
- Plant sweet potato slips 12-18 inches apart and 4 inches deep.
- Water sweet potato plants regularly, especially during hot, dry weather.
- Mulch around sweet potato plants to help conserve moisture and suppress weeds.
- Harvest sweet potatoes in the fall, when the skin is smooth and the vines have started to yellow.

When to plant Sweet Potato Tubers
Sweet potatoes are warm-weather crops that thrive in hot, sunny conditions. The ideal planting time for your sweet potatoes are when the soil temperature has warmed to at least 60 degrees Fahrenheit (15 degrees Celsius). This typically occurs in late spring or early summer, depending on your region.
Here’s a more detailed guide on when to plant sweet potatoes based on your climate:
USDA Hardiness Zone:
- Zones 8-10: Plant sweet potatoes from mid-April to early June.
- Zones 6-7: Plant sweet potatoes from late May to early June.
- Zones 5 and below: Sweet potatoes may not have enough time to mature in these zones. If you live in a cooler climate, consider starting sweet potato slips indoors a few weeks before transplanting them outdoors.
Soil Temperature:
- Ideally, soil temperatures should be at least 60 degrees Fahrenheit (15 degrees Celsius) for planting sweet potatoes.
- You can check soil temperature using a soil thermometer. Insert the thermometer into the soil at a depth of 4-6 inches. If the temperature is below 60 degrees Fahrenheit, wait a few more days before planting.
Last Frost Date:
- Avoid planting sweet potatoes before the last frost date in your area. Late frosts can damage or kill young sweet potato plants.
- You can find your last frost date by checking with your local extension office or online resources.
Overall, the best time to plant sweet potatoes is when the soil temperature is warm, the risk of frost has passed, and you have at least 120-150 days of frost-free weather.
Here are some additional tips for planting sweet potatoes:
- Choose a sunny location with well-drained soil. Sweet potatoes need lots of sun to grow and produce abundant yields.
- Amend the soil with compost or other organic matter to improve drainage and fertility.
- Plant sweet potato slips or tubers 12-18 inches apart and 4 inches deep.
- Water sweet potato plants regularly, especially during hot, dry weather.
- Apply a layer of mulch around the plants to help conserve moisture and suppress weeds.
- Harvest sweet potatoes in the fall, when the skin is smooth and the vines have started to yellow.

How to plant Sweet Potato Slips
Sweet Potato slips are actually Sweet potato vines. Once the slips have grown to about 6 inches tall, they are ready to be transplanted into the garden bed. Plant the slips 12-18 inches apart, in rows that are 3-4 feet apart. Water the slips regularly, especially during hot weather. Sweet potato slips can be grown indoors or outdoors. If you are growing them indoors, place them in a warm, sunny spot. If you are growing them outdoors, plant them in a sunny spot with well-drained soil. Sweet potato slips are a great way to start your own sweet potato plants. They are easy to grow and can be transplanted into the garden once they are large enough.
Important tips for growing sweet potato slips:
- Use a mature sweet potato that is free of blemishes.
- Cut the sweet potato into 2-3 inch pieces.
- Make sure the cut ends are dry before placing them in a warm, moist place.
- The slips will start to sprout roots in about 2-3 weeks.
- Once the slips have roots, they can be transplanted into the garden or into pots.
- Water the slips regularly, especially during hot weather.
- Fertilize the slips every few weeks with a balanced fertilizer.
- Protect the slips from pests and diseases.
The Best Soil for Growing Sweet Potatoes
Sweet potatoes thrive in well-drained, light, and sandy loam soils. Sandy loam soil offers the perfect balance of aeration and moisture retention, which is crucial for sweet potato root development. The loose texture of sandy loam soil allows for adequate drainage, preventing waterlogging and root rot. Simultaneously, the fine sand particles provide sufficient moisture retention to support the plant’s growth.
The ideal soil pH for sweet potatoes falls between 5.5 and 6.8. Soil acidity or alkalinity can affect nutrient uptake and overall plant health. Maintaining the optimal pH range ensures that sweet potatoes have access to essential nutrients for optimal growth.
To prepare your soil for sweet potatoes, follow these steps:
- Choose a suitable site: Select a sunny location with well-drained soil. Sweet potatoes require ample sunlight for photosynthesis and proper development.
- Test your soil: Check the soil pH using a soil test kit. If the pH is outside the desired range, amend the soil accordingly. For acidic soil, add lime; for alkaline soil, add sulfur.
- Incorporate organic matter: Mix in compost, aged manure, or other organic matter to improve soil structure, drainage, and fertility. Organic matter enhances nutrient availability and water retention.
- Till or dig the soil: Loosen the soil to a depth of 8-12 inches. This aeration allows for better root penetration and facilitates nutrient uptake.
- Create raised beds (optional): If your soil is heavy or poorly drained, consider creating raised beds. Raised beds provide better drainage and improve soil structure.

Do Sweet Potatoes Need Fertilizer?
Sweet potatoes are considered moderate feeders, meaning they require moderate amounts of nutrients for optimal growth. While they can tolerate less fertile soils, providing fertilizer can enhance their growth and yield.
The timing and type of fertilizer depend on the soil fertility and the sweet potato variety. Generally, a balanced fertilizer with an N-P-K ratio of 1:1:1 or 1:2:1 applied at planting and again 4-6 weeks later is sufficient for most sweet potato varieties.
How to fertilize Sweet Potatoes
Soil Testing:
Before applying fertilizer, it’s essential to test your soil to determine its nutrient levels. This will help you avoid over-fertilizing, which can be harmful to the plants and the environment.
Fertilizer Application:
Incorporate the recommended amount of fertilizer into the soil at planting time. For subsequent applications, side-dress the fertilizer by placing it alongside the plants and watering it in well.
Nitrogen (N):
Sweet potatoes require moderate amounts of nitrogen for leaf growth and vine development. Excessive nitrogen can promote excessive foliage growth at the expense of root development.
Phosphorus (P):
Phosphorus is crucial for root development and tuber formation. Sweet potatoes typically require moderate amounts of phosphorus.
Potassium (K):
Potassium plays a vital role in plant health, disease resistance, and tuber quality. Sweet potatoes have a moderate to high potassium requirement.
Organic Fertilizers:
Organic fertilizers, such as compost, aged manure, and fish emulsion, provide a slow release of nutrients and improve soil structure. They are considered an environmentally friendly option.
Synthetic Fertilizers:
Synthetic fertilizers provide a quick release of nutrients and are readily available in commercial formulations. However, excessive use of synthetic fertilizers can lead to nutrient runoff and environmental concerns.
Timing of Fertilization:
Apply fertilizer at planting time to provide initial nutrients for plant establishment. Follow with side-dressings 4-6 weeks later to support tuber development.
Signs of Nutrient Deficiency:
Yellowing leaves or stunted growth may indicate nitrogen deficiency. Purple leaf veins or slow growth could suggest phosphorus deficiency. Weak stems or poor tuber quality may be signs of potassium deficiency.
Monitoring Soil Fertility:
Regular soil testing can help you track nutrient levels and adjust your fertilization program accordingly.
Remember, over-fertilizing can be detrimental to sweet potatoes and the environment. Stick to the recommended fertilizer rates and monitor plant growth for signs of nutrient deficiency or excess.
When to harvest your sweet potatoes
Sweet potatoes are typically ready to harvest 100-120 days after planting. The leaves of the plants will start to yellow when the sweet potatoes are ready to harvest. Gently dig up the sweet potatoes and take care not to damage the tubers.
Here are some tips for harvesting sweet potatoes:
- Use a shovel or garden fork to gently dig up the sweet potatoes.
- Be careful not to damage the tubers.
- Brush off any dirt from the sweet potatoes.
- Allow the sweet potatoes to cure in a warm, humid location for 7-10 days.
- Store the cured sweet potatoes in a cool, dry place.
If you are unsure whether your sweet potatoes are ready to harvest, you can check the skin of the tubers. The skin should be firm and not easily scratched. You can also try pulling on a sweet potato. If it comes out easily, it is ready to harvest.

How to grow Sweet Potatoes in containers
Growing sweet potatoes in containers is a great way to enjoy these delicious and nutritious tubers even if you don’t have a lot of space. Here are some tips for growing sweet potatoes in containers:
Choose the right container:
- Select a container that is at least 18 inches deep and 24 inches wide. Sweet potatoes have large root systems, so they need plenty of space to grow.
- Make sure the container has drainage holes to prevent waterlogging.
Use the right potting mix:
- Use a well-drained potting mix that is high in organic matter. You can also mix your own potting mix using equal parts peat moss, perlite, and vermiculite.
Planting sweet potatoes in containers:
- Start with sweet potato slips, which are young plants that have been grown from cuttings. You can find sweet potato slips at most garden centers.
- Plant the slips 4-6 inches deep in the potting mix.
- Water the plants thoroughly after planting.
Caring for sweet potatoes in containers:
- Place the containers in a sunny location where they will receive at least 6 hours of sunlight per day.
- Water the plants regularly, especially during hot weather. Make sure the potting mix is moist but not soggy.
- Fertilize the plants every few weeks with a balanced fertilizer.
- Monitor the plants for pests and diseases.
Harvesting sweet potatoes in containers:
- Sweet potatoes are typically ready to harvest in 100-120 days.
- The leaves of the plants will start to yellow when the sweet potatoes are ready to harvest.
- Gently dig up the sweet potatoes and take care not to damage the tubers.
Last-minute tips for growing sweet potatoes:
- Sweet potatoes are susceptible to pests and diseases, so it’s important to inspect the plants regularly. If you see any signs of pests or diseases, treat them immediately.
- Sweet potatoes can be stored for several months in a cool, dark place.
Sweet potatoes are generally hardy and easy to grow, but they can face some common problems that may affect their growth and yield.

Here are some common sweet potato growing problems and tips on how to address them:
Pests:
- Sweet Potato Weevils: These insects can damage sweet potatoes by tunneling into the roots. To control weevils, rotate crops, use insect-resistant varieties, and remove and destroy infested plants.
- Slugs and Snails: These pests can cause damage to young sweet potato plants. Use organic slug and snail control methods, such as diatomaceous earth or beer traps.
Diseases:
- Fungal Diseases: Diseases like Fusarium wilt and root rot can affect sweet potatoes. Practice crop rotation, use disease-resistant varieties, and avoid overwatering to prevent these diseases.
- Viral Diseases: Viruses can be transmitted by insects. Control insect pests to minimize the risk of viral infections.
Soil Issues:
- Poor Drainage: Sweet potatoes prefer well-draining soil. Ensure proper drainage to prevent waterlogged conditions, as overly wet soil can lead to root rot.
- Compacted Soil: Compacted soil can hinder root development. Loosen the soil before planting to promote good root growth.
Environmental Factors:
- Temperature Fluctuations: Sweet potatoes thrive in warm temperatures. Cold temperatures can slow down growth, and frost can damage the vines. Plant sweet potatoes after the last frost in your area.
- Inadequate Sunlight: Sweet potatoes require full sunlight for optimal growth. Ensure they receive at least 6-8 hours of direct sunlight per day.
Improper Planting:
- Crowded Plants: Plant sweet potatoes with adequate spacing to allow for proper development. Crowded plants can lead to smaller tubers.
- Improper Planting Depth: Plant sweet potato slips at the right depth—usually 3-4 inches deep. Planting too shallow or too deep can affect tuber development.
Over-Fertilization:
- Excessive Nitrogen: Too much nitrogen can result in lush foliage at the expense of tuber development. Use a balanced fertilizer and avoid excessive nitrogen.
Harvesting Issues:
- Harvesting Too Early: Harvest sweet potatoes after they have reached maturity. Harvesting too early can result in smaller tubers.
- Improper Handling: Handle sweet potatoes carefully during harvesting to avoid bruising or damaging the skin, which can lead to storage problems.
By addressing these common issues, you can promote healthy sweet potato growth and improve your overall harvest. Regular monitoring and prompt action can help prevent and mitigate potential problems.
Sweet Potatoes are an amazing and healthy vegetable to add to your garden and diet! Their ideal conditions are full sun, regular watering, and a great fertilizer schedule. If you follow these tips you can harvest your own home grown sweet potatoes!
Happy Gardening
6 responses to “How to Grow Sweet Potatoes in your home garden”
Leave a Reply
Nestera Chicken Coop

Park Seed
Garden Tower Project
Vego Garden Beds

Botanical Interests
Amazon Favorites!

Hoselink
Web Stories


[…] How to Grow Sweet Potatoes In your Garden […]
[…] How to grow Sweet Potatoes In your Home garden […]
[…] 2. Sweet Potatoes […]
[…] How to Grow Sweet Potatoes in your Home Garden […]
[…] How to Grow Sweet Potatoes In your Garden […]
[…] Potatoes […]