Hatching Quail Eggs Successfully: A Beginner’s Guide
Hatching quail eggs is both thrilling and rewarding. These petite birds not only provide a sustainable source of eggs and meat but also bring joy to any backyard enthusiast. Let’s dive deep into hatching quail eggs, brooder setup, and essential care tips to ensure your quail-raising adventure is a soaring success!

Selecting the Right Quail Breed
Before setting up your incubator, it’s crucial to choose a quail breed that aligns with your goals. Coturnix quail are highly recommended for beginners due to their hardiness and adaptability to captivity. They come in various feather colors, adding a splash of beauty to your flock.
Quail Embryo Development: From Egg to Hatch
| Day | Development Stage | Description |
|---|---|---|
| Day 1 | Fertilization & Cell Division | The embryo begins developing as cells rapidly divide. |
| Day 2-3 | Formation of the Heart & Blood Vessels | The heart starts beating, and blood vessels spread. |
| Day 4-5 | Limb & Organ Development | Wings, legs, and internal organs begin forming. |
| Day 6-7 | Beak & Eye Formation | The beak and eyes become more defined; feathers begin developing. |
| Day 8-10 | Bone & Muscle Growth | The chick’s skeleton strengthens, and movement starts. |
| Day 11-13 | Final Development | Feathers grow, and the chick positions itself for hatching. |
| Day 14 | Absorption of Yolk | The chick absorbs nutrients from the yolk to prepare for hatching. |
| Day 15-17 | Pipping Begins | The chick breaks the eggshell with its egg tooth, preparing to emerge. |
| Day 18 | Hatch Day! | The chick fully hatches, exhausted but ready to dry and fluff up. |
Tips for a Successful Hatch:
- Keep humidity around 50-60% during incubation and increase to 70-75% on hatch day.
- Use a second Hygrometer inside your incubator to monitor temperature and humidity.
- Temperature should stay at 99.5°F (37.5°C) in a forced-air incubator.
- Avoid opening the incubator too often, especially in the final days.
- Be patient—some chicks may take 24 hours to fully hatch after pipping.

Preparing for Incubation
Choosing the Right Incubator for hatching quail
Selecting a reliable incubator is paramount. Here are some top recommendations:
Brinsea Mini Advanced
This compact incubator holds up to 12 quail eggs and offers full digital control with excellent visibility, making it perfect for beginners.
Nurture Right 360
With a capacity of 44 quail eggs, this incubator boasts 360-degree visibility and external water addition, ensuring minimal disturbance during incubation.
GQF Hovabator
A tabletop incubator that can accommodate up to 120 quail eggs with the quail egg turner, offering reliable performance for larger batches.
Setting Up the Incubator
- Temperature: Maintain a consistent temperature of 99.5°F (37.5°C) throughout the incubation period.
- Humidity: For the first 14 days, keep humidity levels between 45-50%. Increase it to 65-70% from day 15 until hatching.
- Egg Turning: If your incubator doesn’t have an automatic turner, manually rotate the eggs at least three times daily from day 1 to day 14. Stop turning after day 14 to allow chicks to position themselves for hatching.
Monitoring Progress
Regularly monitor temperature and humidity levels using reliable thermometers and hygrometers. Candling the eggs around day 10 can help assess embryo development, though quail eggs’ speckled shells can make this challenging.

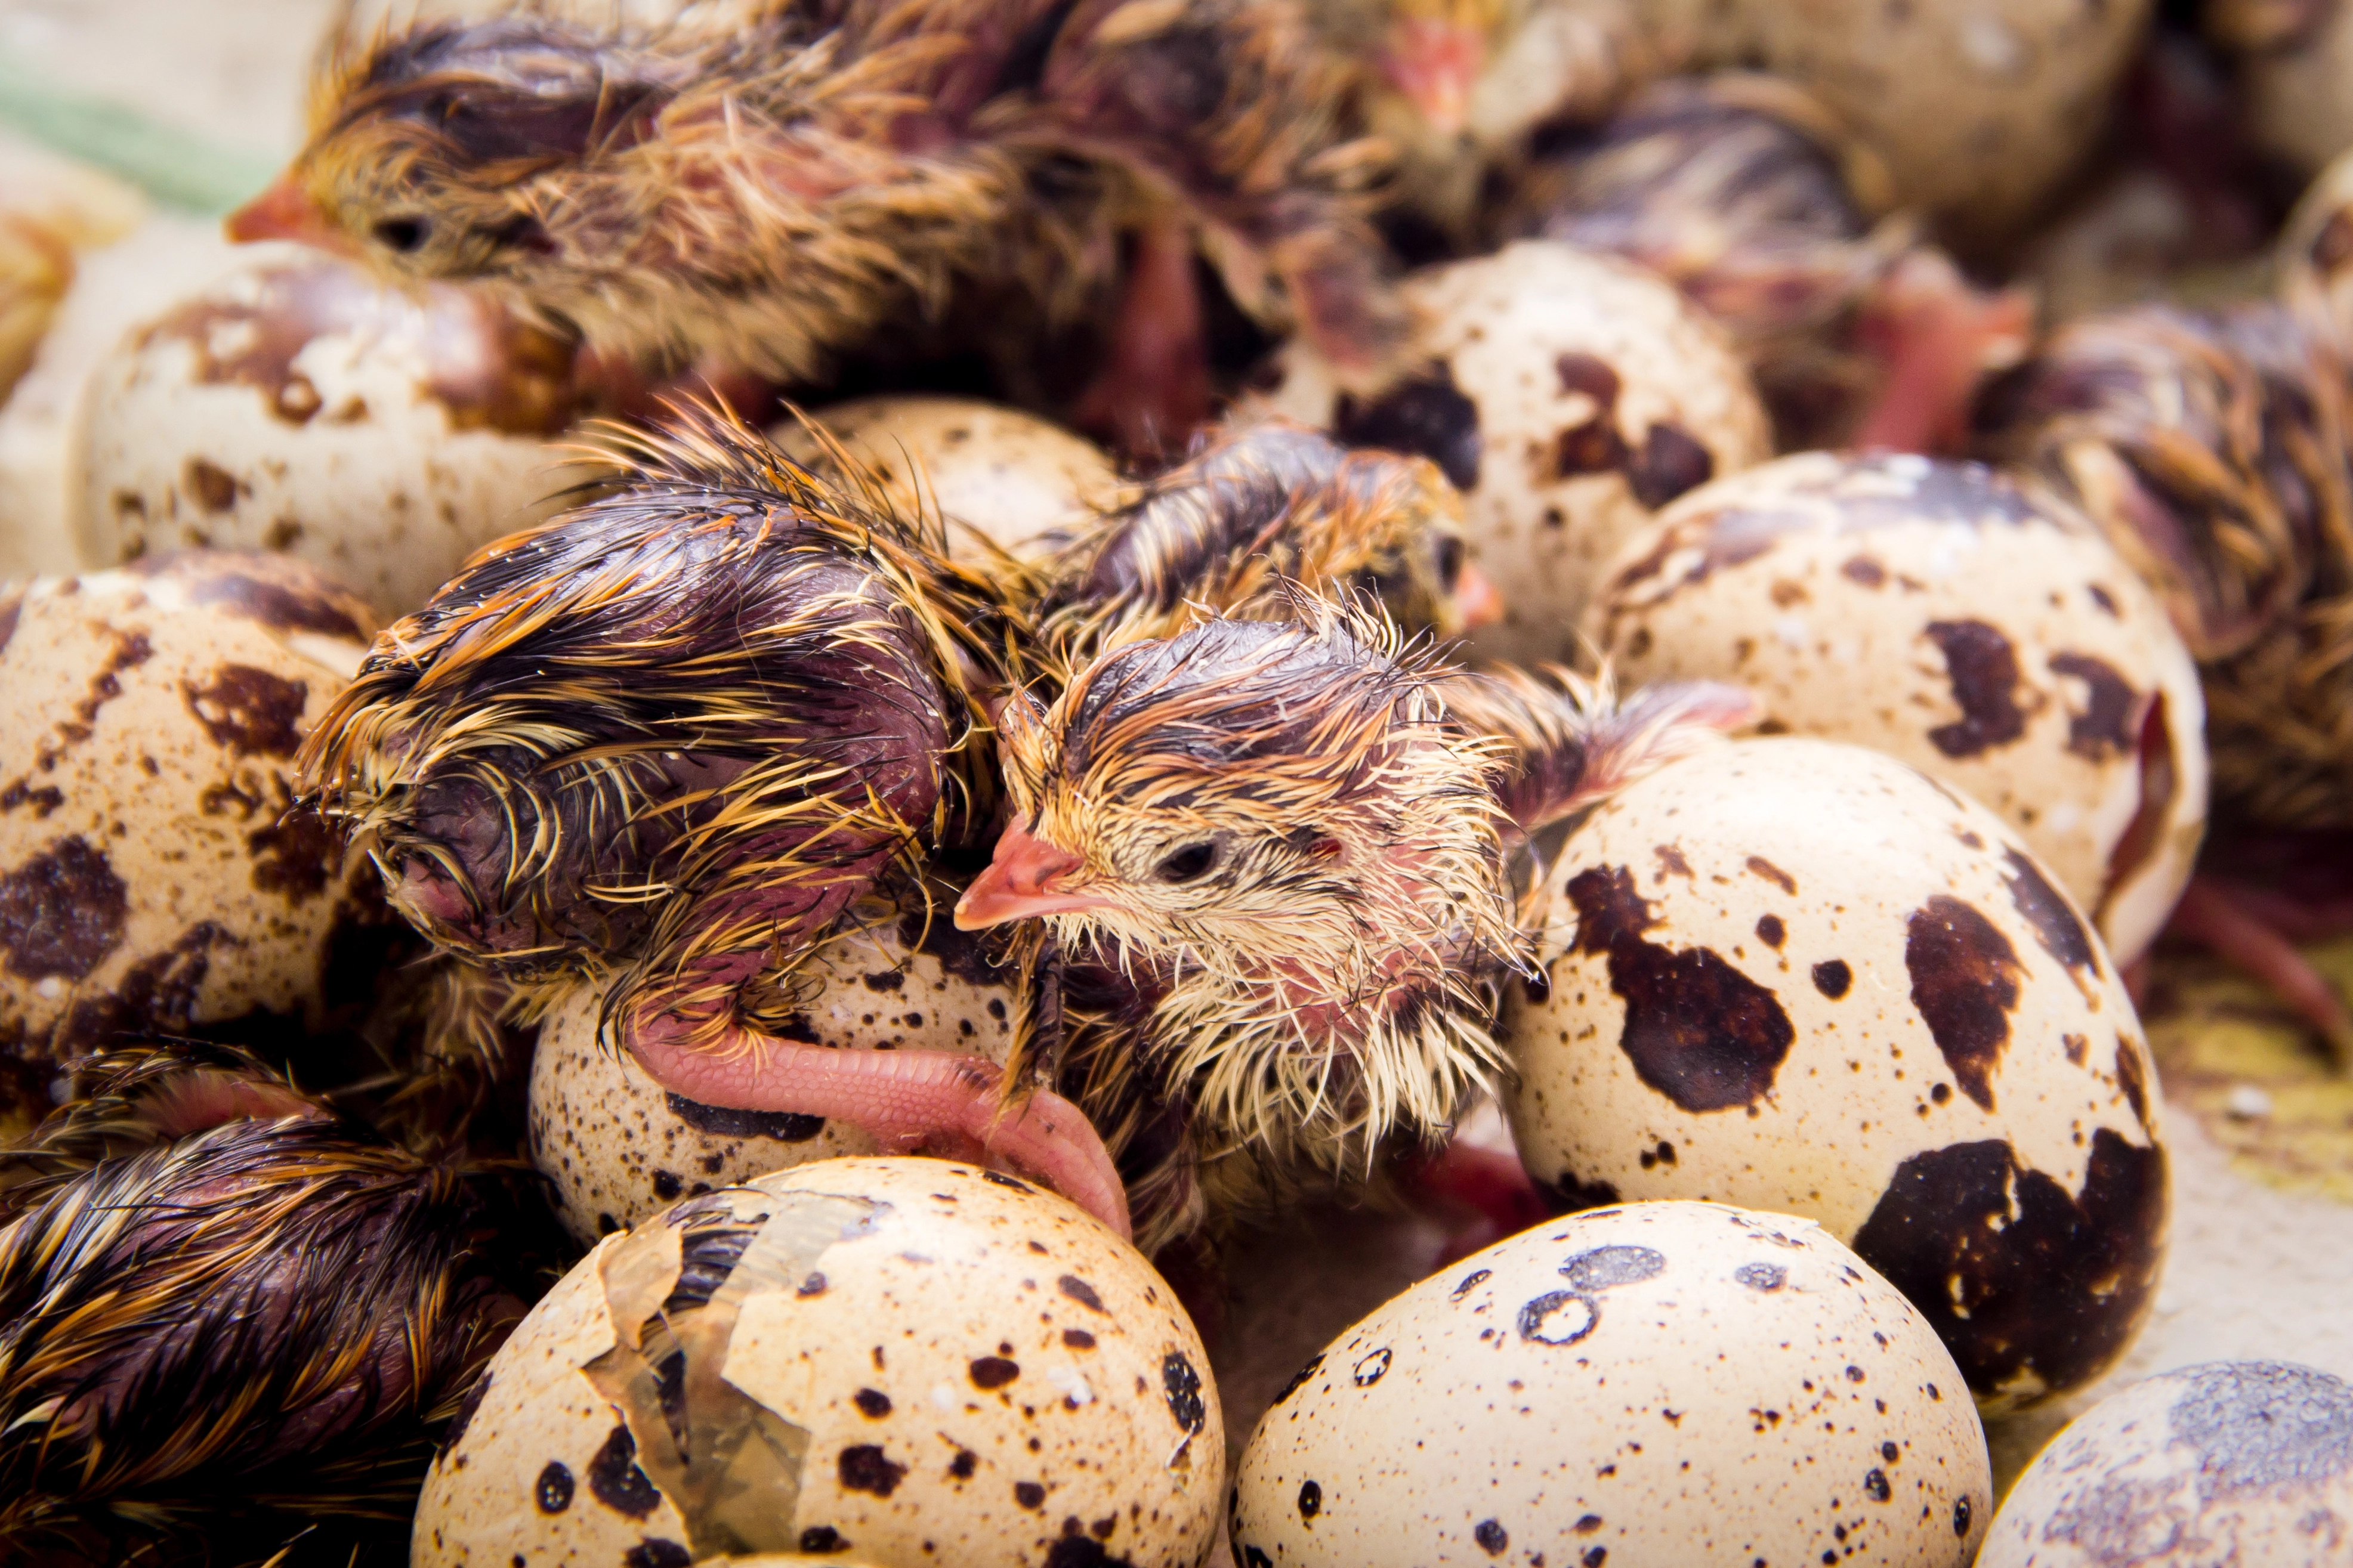
The Hatching Process
Quail eggs typically hatch around day 18 of incubation. However, some may begin pipping as early as day 15 or as late as day 22. It’s essential to maintain high humidity during this period to prevent chicks from sticking to the shell.
Once hatched, allow chicks to dry and fluff up in the incubator before transferring them to the brooder. This process can take several hours, so patience is key!
Trouble Shooting Hatching Issues
If you’re experiencing hatching issues with quail eggs, there are several factors to troubleshoot to improve hatch rates. First, check your incubator’s temperature and humidity levels—quail eggs typically require a stable temperature around 99.5°F and a humidity level of 45-55% during incubation, increasing to 65-70% during lockdown (the last three days). Inconsistent temperature is one of the most common reasons for poor hatching.
Ensure that the eggs are being turned regularly (3–5 times daily) until day 14, after which turning should stop to allow chicks to position for hatching. Poor ventilation, contaminated eggs, or using older or improperly stored eggs can also reduce viability. If chicks are fully formed but don’t hatch, this often points to low humidity or improper turning. Regularly cleaning your incubator and using a reliable thermometer and hygrometer are key to maintaining ideal conditions for a successful hatch.
Setting Up the Quail Brooder
A well-prepared brooder ensures your quail chicks thrive in their early days.
Brooder Essentials
- Container: A plastic storage bin, cardboard box, or specialized brooder box can serve as the brooding area. Ensure it’s spacious enough to prevent overcrowding.
- Bedding: Line the brooder with paper towels for the first few days to provide a non-slip surface. Afterward, transition to kiln-dried pine shavings. Avoid using materials like newspaper, which can be slippery and cause leg issues.
- Heat Source: Maintain an initial temperature of 95°F (35°C) in the brooder. Use a heat lamp or brooder heat plate, placing it on one side to allow chicks to self-regulate their temperature by moving closer or farther from the heat source.
- Feeders and Waterers: Use shallow feeders and waterers to prevent drowning. Place them on the cooler side of the brooder. Elevating them slightly on a solid base can reduce contamination.
Feeding Your Quail Chicks
Provide a high-protein gamebird starter feed with 28-30% protein content to support rapid growth. Ensure the feed is in crumble form to facilitate easy consumption by the tiny chicks.
Monitoring and Care
- Temperature Adjustment: Gradually decrease the brooder temperature by 5°F each week until it matches room temperature or the chicks are fully feathered.
- Cleanliness: Regularly clean the brooder to prevent disease. Replace bedding as needed and ensure feeders and waterers are free from debris.
- Observation: Keep a close eye on your chicks. Active, evenly dispersed chicks indicate a comfortable environment, while huddling under the heat source may signal they are too cold.

Quail Chick Temperature Needs (Week 1 – Week 5)
| Week | Temperature (°F) | Temperature (°C) | Notes |
|---|---|---|---|
| 1 | 95 | 35 | Keep them cozy with a heat lamp or brooder plate. Monitor for huddling or overheating. |
| 2 | 90 | 32 | Gradually reduce temperature by about 5°F (3°C) each week. |
| 3 | 85 | 29 | Chicks are feathering out; ensure they can move away from heat if needed. |
| 4 | 80 | 27 | Continue to monitor chick behavior for correct temperature adjustment. |
| 5 | 75 | 24 | By now, they’re almost fully feathered and nearly ready for outdoor transition. |
Tips for Weeks 1 – 5
- Observe Chick Behavior
- If they’re huddling together under the heat source, they’re likely cold.
- If they’re spreading out or panting, they may be too warm.
- Cleanliness is Key
- Refresh bedding and water daily to reduce the risk of disease.
- Gradual Changes
- Lowering the temperature by about 5°F each week helps chicks adjust smoothly.
- Preparing for Outdoors
- Around Week 5 (or once nighttime temperatures are stable and the chicks are fully feathered), start acclimating them to cooler temps.

Encouragement for the Journey
Hatching quail is a delightful endeavor that offers continuous learning and satisfaction. Each step, from the first pip to watching your chicks explore their brooder, brings immense joy. Embrace the experience, celebrate the milestones, and remember—every quail keeper started where you are now. Happy hatching!
For a visual guide on Hatching Quail and setting up a quail brooder, check out this helpful video:
Want To Learn More?
IF YOU LIKE THIS POST
You might also like these:
We’d love to hang out with you on our social channels. You can subscribe to our blog and find us on Facebook, Youtube, Instagram and Pinterest! Feel free to reach out if you have any plant questions!
DISCLOSURE
This blog post may contain affiliate links. Which means if you click on a link and go on to buy the product I recommend, I may get a small commission at no extra cost to you.
Thank you for your support. It means the world to us!

The Thrifted Planter
Ciearra is a gardener and houseplant enthusiast of over 10 years! She has been growing indoors and outdoors. Supplying food for her family and beautifying her home with annuals, perennials and houseplants! Ciearra is passionate about sharing her knowledge of plant care with anyone who needs help or a quick plant growth tip! When she’s not blogging you can find her tending to her chickens, dogs and hanging out with her family

Nestera Chicken Coop

Park Seed
Garden Tower Project
Vego Garden Beds

Botanical Interests
Amazon Favorites!

Hoselink
Web Stories


