🌸 How to Grow Clematis Plants: A Beginner’s Guide
How to Grow Clematis
Clematis plants, often dubbed the “queen of climbers,” is a favorite among gardeners for its vibrant blooms and versatility. Whether you’re envisioning a cascade of flowers over a trellis or a colorful addition to your garden fence, growing clematis can transform your outdoor space.
For new gardeners, understanding the nuances of planting, caring, and maintaining clematis is crucial. This guide will walk you through every step, ensuring your clematis thrives season after season.(The Times)

Understanding Clematis Plants: An Overview
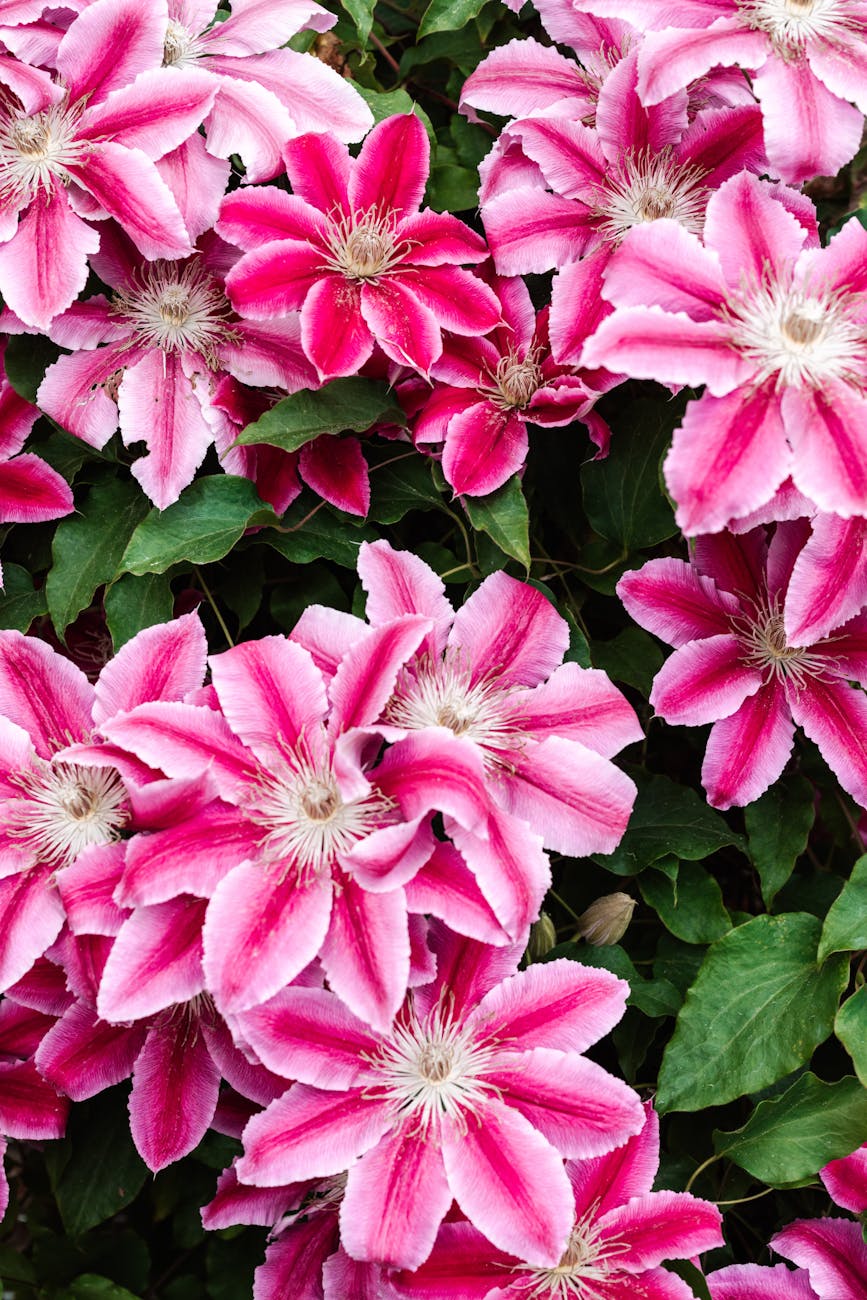
Clematis is a genus encompassing over 300 species, known for their climbing habit and showy flowers. They can range from small-flowered varieties to large, dramatic blooms, making them suitable for various garden styles.
Choosing the Right Clematis Plant Variety
Selecting the appropriate clematis variety is pivotal. Some popular choices include:
- Clematis ‘Jackmanii’: Known for its deep purple flowers and vigorous growth.
- Clematis ‘Nelly Moser’: Features pale pink blooms with a distinctive stripe.
- Clematis viticella: Hardy and resistant to wilt, ideal for beginners.
Consider bloom time, flower size, and growth habit when choosing.(Gardener’s Supply)
Choosing the right clematis plants for your garden depends on several key factors, including your climate zone, sunlight conditions, garden space, and desired bloom time. Clematis varieties are categorized by their bloom season—early, midseason, or late—and by growth habit, ranging from compact container-friendly types to vigorous climbers that can cover fences, trellises, or pergolas. For sunny spots with well-draining soil, opt for sun-loving varieties like Clematis ‘Jackmanii’ or Clematis ‘The President’.
In partial shade, varieties like Clematis alpina or Clematis montana thrive. If space is limited, choose compact varieties such as Clematis ‘Bijou’ or Clematis ‘Arabella’. Also consider the pruning group—Group 1, 2, or 3—as this affects maintenance and bloom timing. By selecting the best clematis for your growing conditions and aesthetic goals, you’ll enjoy vibrant blooms and healthy growth season after season.

Optimal Planting Time and Location
The best time to plant clematis in your garden is during the spring or early fall when temperatures are mild and the roots can establish before extreme weather sets in. Choose a planting location that receives at least six hours of sunlight per day, as clematis thrive in full sun but appreciate having their roots shaded and cool—this can be achieved with mulch or by planting low-growing perennials at the base.
Ensure the spot has well-draining soil enriched with organic matter, and place your clematis near a support structure like a trellis, arbor, or fence for climbing. Avoid planting too close to large trees or shrubs, which can compete for nutrients and shade the plant excessively. By selecting the optimal planting time and a sunny, supportive location with cool, moist soil, you’ll give your clematis the strongest start and enjoy lush vines and abundant blooms for years to come.
Soil Preparation and Clematis Planting Techniques
Clematis thrives in well-draining, fertile soil. Incorporate compost or well-rotted manure to enrich the planting hole. Plant the crown 1-2 inches below the soil surface to encourage strong growth. (Southern Living, BBC Gardeners World Magazine, longfield-gardens.com)
Watering and Mulching Practices
Properly watering your clematis plant is essential for healthy growth and abundant blooms. Clematis prefer consistently moist, well-draining soil—never soggy, but never completely dry. Water deeply once or twice a week, especially during hot, dry weather or when the plant is establishing. It’s best to water at the base to avoid wetting the foliage, which can lead to fungal issues. Mulching your clematis is equally important—it helps retain soil moisture, regulate root temperature, and suppress weeds.
Apply a 2–3 inch layer of organic mulch, such as shredded bark or compost, around the base of the plant, keeping it a few inches away from the stem to prevent rot. Mulching also helps keep the roots cool, which is ideal since clematis enjoy “cool feet” and warm tops. With proper watering and mulching practices, your clematis will thrive and reward you with vibrant flowers throughout the growing season.

Fertilizing for Vibrant Blooms
To keep your clematis thriving, it’s important to properly fertilize clematis plants throughout the growing season. Begin feeding in early spring when new growth appears, using a balanced, slow-release fertilizer or a water-soluble fertilizer with equal parts nitrogen, phosphorus, and potassium—such as a 10-10-10 or 20-20-20 formula. Apply fertilizer monthly during the active growing period, stopping in late summer to allow the plant to harden off before winter.
Avoid over-fertilizing, as this can lead to excessive foliage and fewer blooms. For best results, water the plant thoroughly before and after applying fertilizer to prevent root burn. Additionally, enriching the soil with compost or well-rotted manure each year boosts soil health and encourages strong, vibrant growth. By maintaining a regular clematis fertilization schedule, you’ll support lush foliage, strong root development, and an abundance of stunning blooms season after season.
Pruning Clematis: When and How
Pruning depends on the clematis group:
- Group 1: Flower on old wood; prune after flowering.
- Group 2: Flower on old and new wood; light pruning in early spring.
- Group 3: Flower on new wood; prune back hard in early spring.
Knowing when to prune clematis depends on identifying which pruning group your plant belongs to—Group 1, Group 2, or Group 3. Group 1 clematis bloom in early spring on old wood and should be pruned right after flowering to avoid cutting off next year’s buds. Group 2 clematis bloom in late spring to early summer on both old and new wood; prune these lightly in early spring by removing dead or weak stems and cutting back to a pair of healthy buds. Group 3 clematis bloom in late summer to fall on new growth and require a hard prune in early spring, cutting stems back to about 12–18 inches from the ground.
To determine your clematis group, observe when it blooms and where the flowers form—early spring flowers from last year’s stems indicate Group 1, mid-season blooms on old and new growth point to Group 2, and late-season flowers only on new shoots suggest Group 3. Proper clematis pruning encourages healthy growth, more blooms, and a well-shaped plant, so knowing your clematis type is key to getting the best results.

Supporting Your Clematis: Trellises and More
Providing proper support for your clematis plants is essential to help them climb, stay healthy, and produce beautiful blooms. Clematis plants are natural climbers that use their leaf stems to wrap around narrow structures, so the best supports include trellises, obelisks, arbors, fences, or even small trees. Choose a support structure with thin wires, mesh, or lattice that their tendrils can easily grasp—ideally no thicker than ½ inch in diameter. Install the support at planting time to avoid damaging the roots later.
As the plant grows, gently guide and tie the vines to the structure using soft plant ties or garden twine. Make sure the support is tall and sturdy enough for mature varieties, some of which can reach 8 to 12 feet or more. By using the right clematis support system, you not only encourage vertical growth and better air circulation but also showcase the plant’s stunning flowers at eye level for maximum visual impact.
Common Pests and Diseases
Clematis plants, while generally hardy, can suffer from a variety of common pests and diseases that may impact their health and bloom quality. One of the most notorious issues is clematis wilt, a fungal disease that causes sudden stem collapse and blackened foliage—often mistaken for drought stress. To prevent this, plant your clematis deeply and ensure good air circulation. Powdery mildew is another fungal problem, leading to a white, powdery coating on leaves, especially in humid conditions.
Pests such as aphids, spider mites, and slugs are also common, feeding on new growth and weakening the plant. Use insecticidal soap, neem oil, or natural predators like ladybugs to manage infestations. Regularly inspect your plant for signs of leaf spots, yellowing, or distorted growth, which can indicate underlying issues. By staying vigilant and treating problems early, you can protect your clematis from the most common pests and diseases and ensure vibrant, long-lasting blooms.
Growing Clematis in Containers
Growing clematis in pots is a great option for gardeners with limited space, patios, or balconies, and it allows for better control over soil conditions and placement. Choose a large container—at least 18 inches deep and wide—with drainage holes to prevent root rot. Use a high-quality potting mix rich in organic matter and well-draining properties. Plant your clematis deeply, with the crown about 2–3 inches below the soil surface, to encourage strong root development.
Place the container in a sunny location where the vine will get at least six hours of light daily, and provide a trellis or support for it to climb. Keep the soil consistently moist but not soggy, and add mulch to the surface to help keep the roots cool. Fertilize regularly with a balanced, water-soluble fertilizer during the growing season. With the right care, potted clematis plants will thrive and bring stunning vertical color to your container garden.
Winter Care and Protection
Winter care for clematis is essential to protect your plant and ensure healthy growth in the spring. Begin by identifying your clematis variety—Group 1, 2, or 3—as this will determine if pruning is needed before winter. Most Group 3 clematis benefit from a hard prune in late fall, while Group 1 and 2 may only need light trimming after flowering. Once pruned, apply a thick layer of mulch—about 2–3 inches—around the base of the plant to insulate the roots from freezing temperatures and help retain moisture.
In colder climates, consider adding additional protection like straw, leaves, or evergreen boughs around the crown of the plant. Avoid fertilizing in late fall, as this can encourage new growth that may be damaged by frost. With the right clematis winter care routine, your plant will be well-protected during dormancy and ready to burst back to life with vibrant blooms in the spring.

Propagation Techniques
Propagating clematis is a rewarding way to expand your garden with new plants that carry the same beautiful traits as the parent. The most common methods include stem cuttings, layering, and division. For stem cuttings, take softwood cuttings in late spring or early summer, selecting healthy shoots about 4–6 inches long. Remove the lower leaves, dip the cut end in rooting hormone, and plant it in a moist, well-draining propagation mix. Keep the cuttings in a humid environment with indirect light until roots develop, usually within a few weeks.
Layering involves bending a low-growing stem to the ground, wounding it slightly, and covering it with soil while keeping the tip exposed; roots will form after several months, and the new plant can then be separated. Division is suitable for mature clematis with multiple crowns—dig up the plant in early spring or fall and carefully separate rooted sections before replanting. With proper clematis propagation techniques, you can grow healthy new plants to beautify your garden or share with fellow gardeners.
Troubleshooting Common Issues
- Yellowing leaves: May indicate overwatering or nutrient deficiency.
- Lack of blooms: Could be due to improper pruning or insufficient sunlight.
- Wilting: Check for clematis wilt or root issues.(The Spruce)
Quick Takeaways
- Plant clematis in spring or fall for optimal establishment.
- Ensure roots are shaded while the vine receives ample sunlight.
- Regular watering and mulching promote healthy growth.
- Prune according to the clematis group classification.
- Provide sturdy support structures from the outset.
- Monitor for pests and diseases, addressing issues promptly.
- Fertilize appropriately to encourage vibrant blooms.(BBC Gardeners World Magazine, Learning with Experts, The Spruce)
Conclusion
Growing clematis can be a rewarding endeavor, adding vertical interest and vibrant color to your garden. By understanding the specific needs of your chosen variety and providing consistent care, even novice gardeners can enjoy the beauty of clematis blooms year after year.
FAQs
Q: Can I grow clematis in partial shade?
A: Yes, while clematis prefers full sun, many varieties can tolerate partial shade, especially in hotter climates.
Q: How long does it take for clematis to bloom after planting?
A: Typically, clematis may take a year or two to establish and bloom profusely. Patience is key.(Reddit)
Q: Do I need to deadhead clematis?
A: Deadheading can promote a second bloom in some varieties, but it’s not mandatory.(longfield-gardens.com)
Q: Can clematis be grown indoors?
A: Clematis is best suited for outdoor cultivation due to its climbing nature and sunlight requirements.
Q: Is clematis toxic to pets?
A: Yes, clematis contains compounds that can be toxic if ingested by pets. Keep them away from the plant.
Engage with Us
We’d love to hear about your clematis gardening experiences! Have you tried growing a particular variety? Share your successes and challenges in the comments below. If you found this guide helpful, please share it with fellow gardening enthusiasts!

Want To Learn More?
IF YOU LIKE THIS POST
You might also like these:
We’d love to hang out with you on our social channels. You can subscribe to our blog and find us on Facebook, Youtube, Instagram and Pinterest! Feel free to reach out if you have any plant questions!
DISCLOSURE
This blog post may contain affiliate links. Which means if you click on a link and go on to buy the product I recommend, I may get a small commission at no extra cost to you.
Thank you for your support. It means the world to us!

The Thrifted Planter
Ciearra is a gardener and houseplant enthusiast of over 10 years! She has been growing indoors and outdoors. Supplying food for her family and beautifying her home with annuals, perennials and houseplants! Ciearra is passionate about sharing her knowledge of plant care with anyone who needs help or a quick plant growth tip! When she’s not blogging you can find her tending to her chickens, dogs and hanging out with her family

Nestera Chicken Coop

Park Seed
Garden Tower Project
Vego Garden Beds

Botanical Interests
Amazon Favorites!

Hoselink
Web Stories


