How to Propagate Raindrop Peperomia (3 Easy Methods)
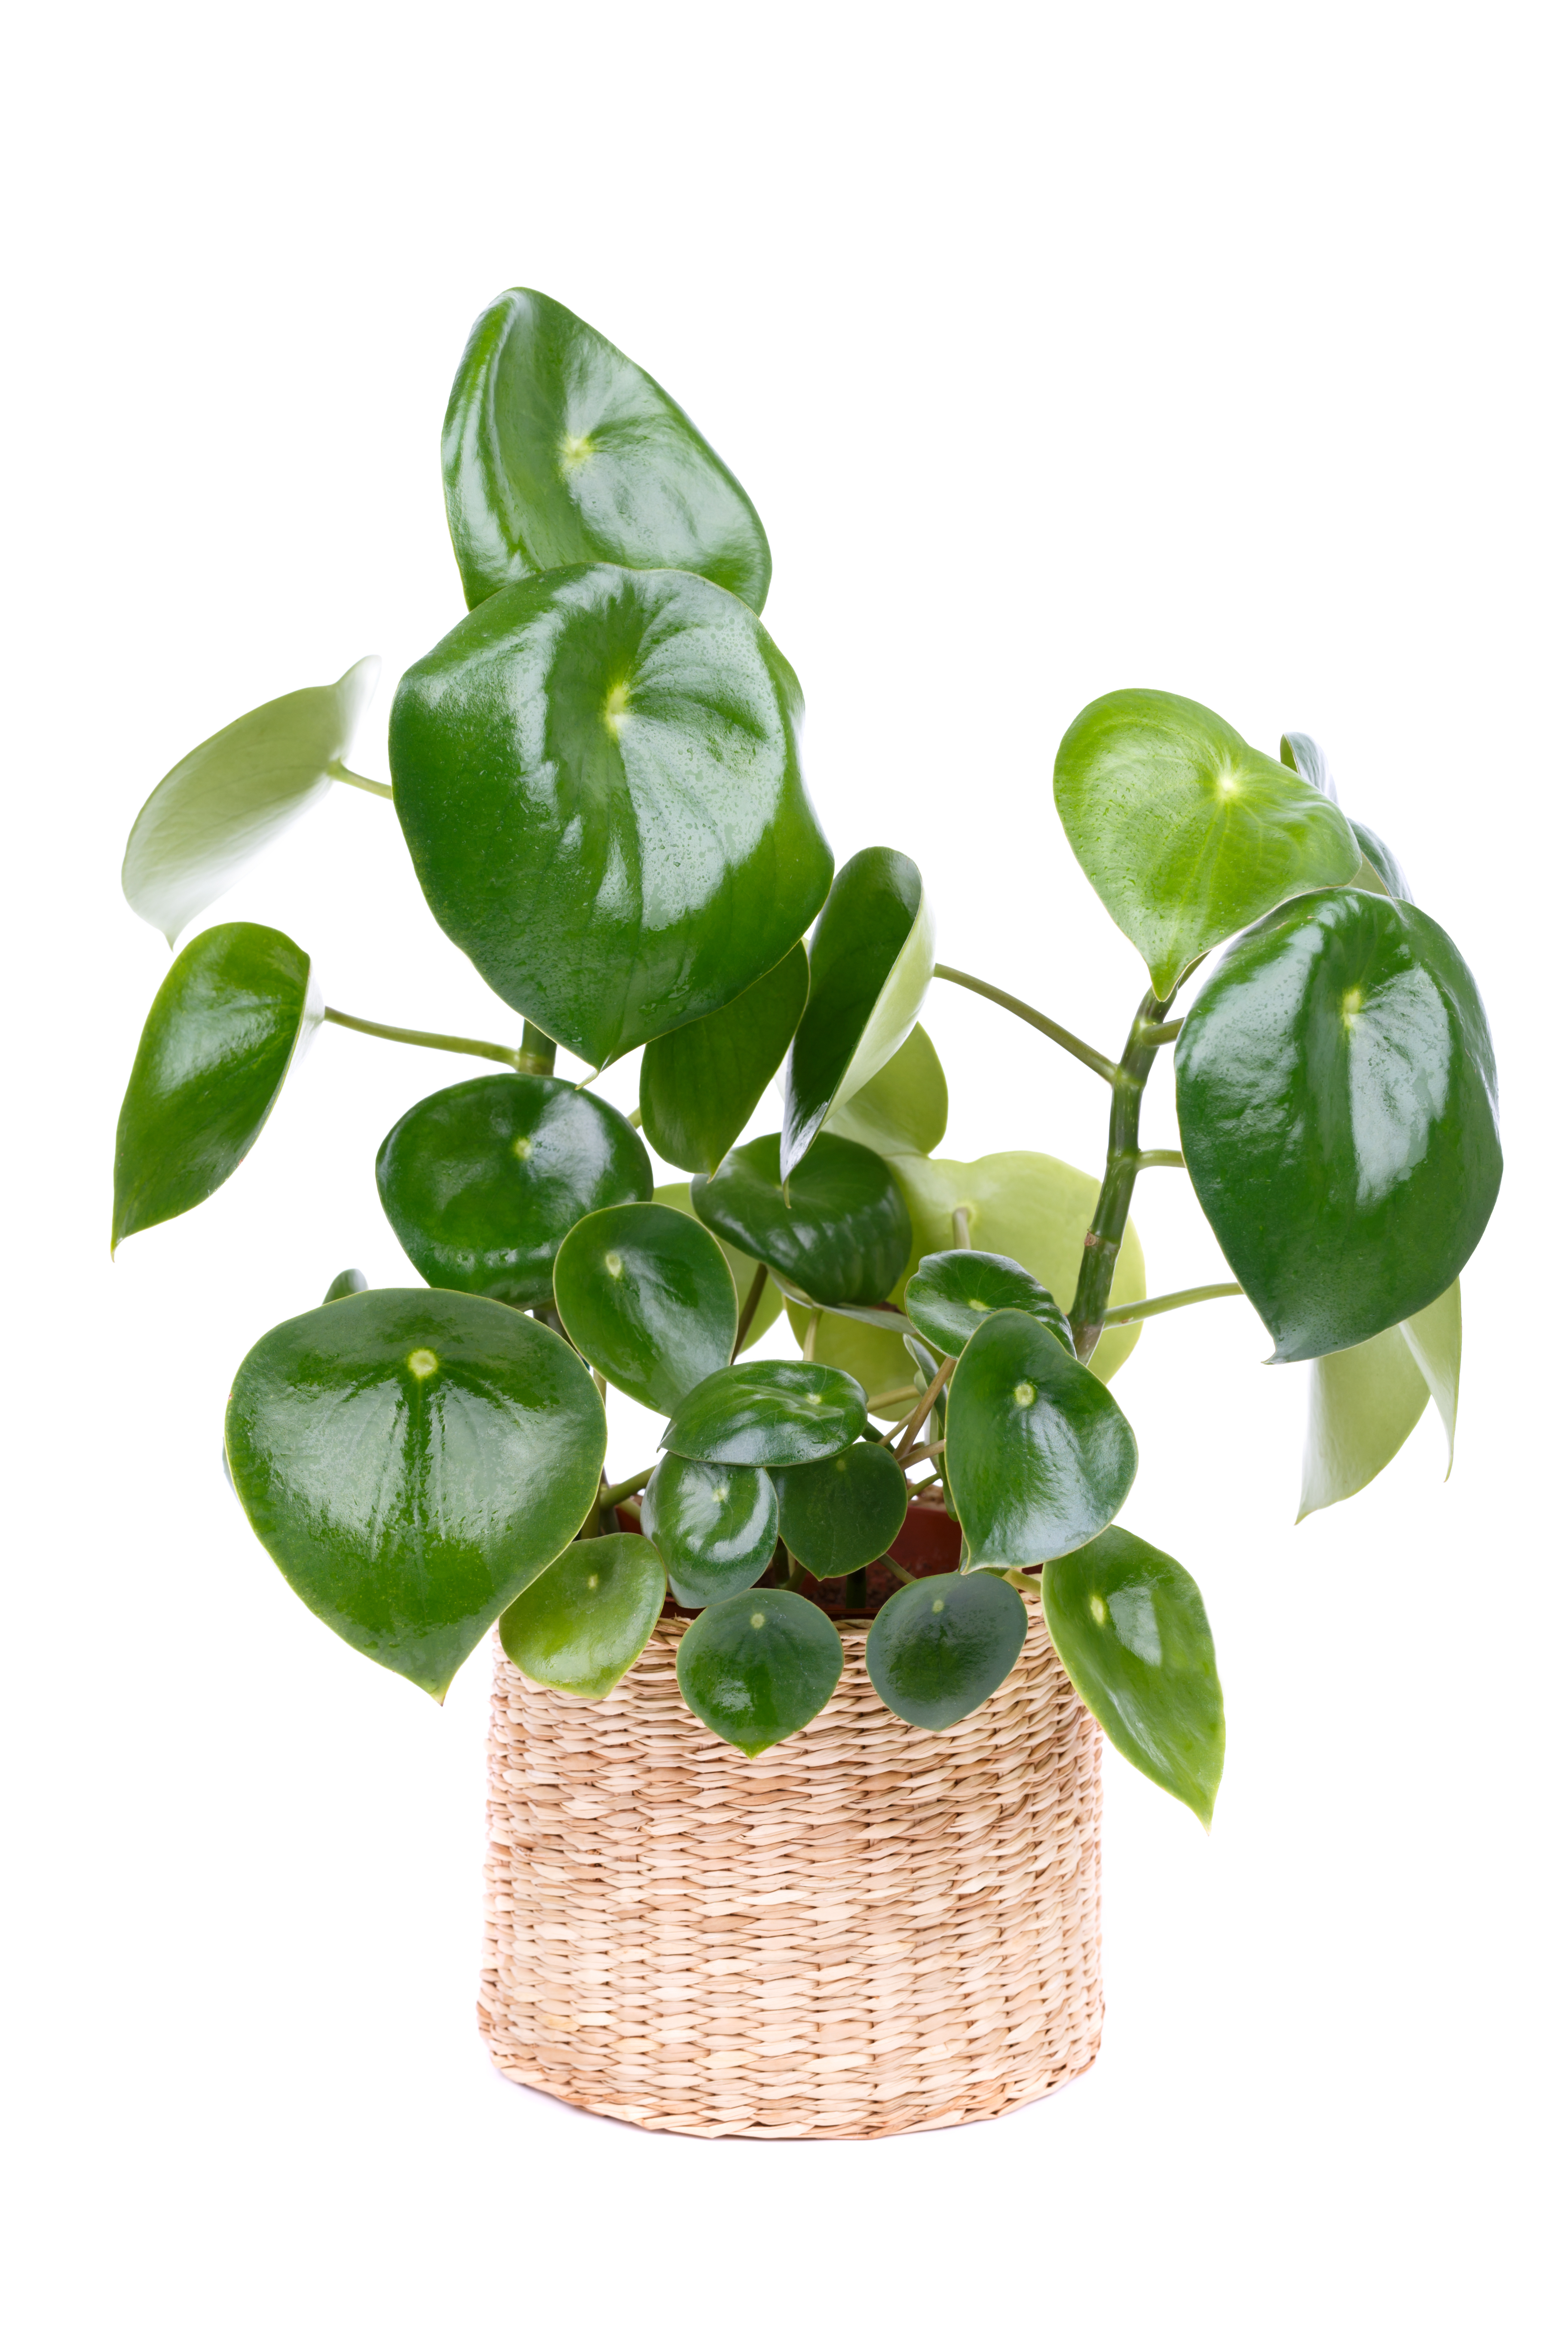
Learning how to propagate Raindrop Peperomia is one of the easiest ways to expand your houseplant collection for free. Whether you choose water propagation, soil propagation, or leaf cuttings, Peperomia polybotrya roots readily under the right conditions. In this guide, I’ll walk you through each propagation method, how long rooting takes, common problems to avoid, and how to care for your new plants once they are established.
The easiest way to propagate Raindrop Peperomia is by taking a healthy stem cutting and rooting it in water or moist potting soil. Most cuttings develop roots within 2–6 weeks when kept warm, humid, and in bright indirect light.
Many people confuse Raindrop peperomia with Pilea Peperomioides, also known as the Chinese Money Plant. While both the Peperomia Raindrop and Chinese Money Plant (Pilea Peperomioides) are popular tropical plants with similar care requirements and looks, they do have distinct characteristics that set them apart from each other.

How to Propagate Raindrop Peperomia
The best way to Propagate Peperomia Raindrop in my opinion is by stem cutting then rooting in soil propagation or water propagation. Here’s how to do both easily.

Propagate Raindrop Peperomia in Water
Propagating Peperomia raindrop in water is a straightforward process that can be done with very little supplies.
Materials Needed:
- Healthy Peperomia Raindrop plant
- Sharp knife or pruning shears
- Clear glass jar or plastic container
- Room-temperature water
Step-by-Step Instructions:
- Select a healthy stem: Choose a healthy, non-flowering stem from your Peperomia raindrop plant. The stem should be at least 3-4 inches long and have several nodes, the points where leaves grow from the stem.
- Make a clean cut: Use a sharp knife or pruning shears to make a clean cut just below a node. Remove any leaves from the bottom 1-2 inches of the stem.
- Prepare the rooting container: Choose a clear glass or plastic container that allows you to see the roots developing. Fill the container with room-temperature water.
- Place the stem in water: Insert the cut end of the stem into the jar of water, ensuring that at least one node is submerged.
- Position in a bright location: Place the container in a bright location with indirect sunlight. Avoid direct sunlight, which can scorch the stem. I put my cuttings in my kitchen windows.
- Change the water regularly: Change the water every 2-3 days to keep it fresh and prevent the growth of bacteria.
- Monitor root development: Keep an eye on the stem and look for signs of root growth or stem rot. New roots typically start to appear within 2-3 weeks.
- Roots: Once the roots are about 1-2 inches long, you can transfer the cutting to a pot with a well-draining potting mix.
Additional Tips:
- Use a rooting hormone (optional): Dipping the cut end of the stem in a rooting hormone can encourage faster root development.
- Increase humidity (optional): Placing a plastic bag over the container can help to increase humidity and create a favorable environment for root growth.
- Be patient: The rooting process can take several weeks, so be patient and allow the plant to develop roots at its own pace.
Propagate Raindrop Peperomia in soil
Propagating Peperomia raindrop in soil is a simple way to propagate! Make sure you use a good well draining soil and keep an eye out for stem root.
Materials Needed:
- Healthy Peperomia raindrop plant
- Sharp knife or pruning shears
- Well-draining soil
- Small pot with drainage holes
- Room-temperature water
Step-by-Step Instructions:
- Select a healthy stem: Choose a healthy stem from your Peperomia raindrop plant. The stem should be at least 3-4 inches long and have several nodes, the points where leaves grow from the stem. Cut off lower leaves and keep 2-3 mature leaves at the top of the cutting
- Make a clean cut: Use a sharp clean knife or pruning shears to make a clean cut just below a node. Remove any leaves from the bottom 1-2 inches of the stem.
- Prepare the potting mix: Fill the small pot with well-draining potting mix. Make sure the potting mix is moist but not soggy.
- Dip the stem in rooting hormone (optional): While not essential, dipping the cut end of the stem in a rooting hormone can encourage faster root development.
- Plant the stem: Insert the cut end of the stem into fresh soil mix, ensuring that at least one node is buried. Firm the potting mix around the base of the stem.
- Water the cutting: Give the cutting a thorough watering to settle the potting mix and provide initial moisture.
- Position in a bright location: Place the pot in a bright location with indirect sunlight. Avoid direct sunlight, which can scorch the stem.
- Maintain humidity: To maintain humidity, consider placing a plastic bag over the pot or using a humidity dome. This will help prevent the leaves from drying out and promote root growth.
- Monitor root development: After a few weeks, gently tug on the stem to check for root development. If there is resistance, the cutting is likely rooted and can be treated like a mature Peperomia raindrop plant. You will soon begin to see new growth on your plant.
Additional Tips:
- Provide warmth: Peperomia raindrop prefers warm temperatures, so keep the cutting in a location with a consistent temperature between 65-80°F (18-27°C).

Leaf Propagate Raindrop Peperomia
When you Propagate Raindrop Peperomia from leaf cuttings just know it may take slightly longer than stem cuttings, leaf cuttings are a fun way produce new plants.
Materials Needed:
- Healthy Peperomia raindrop plant
- Sharp knife or pruning shears
- Well-draining potting mix
- Small pot with drainage holes
- Clear plastic bag or humidity dome
- Room-temperature water
Step-by-Step Instructions:
- Select a healthy leaf: Choose a healthy, mature leaf from your Peperomia raindrop plant. The leaf should be firm and free of pests or diseases.
- Cut the leaf: Use a sharp knife or pruning shears to make a clean cut at the base of the leaf petiole, the stalk that attaches the leaf to the stem.
- Remove any extra petiole: Trim off any excess petiole, leaving about 1/4 inch remaining.
- Prepare the potting mix: Fill the small pot with well-draining potting mix. Make sure the potting mix is moist but not soggy.
- Lay the leaf on the potting mix: Place the cut end of the leaf petiole flat on the surface of the potting mix. Do not bury the petiole in the soil.
- Cover the pot: To maintain humidity, cover the pot with a clear plastic bag or use a humidity dome. This will help prevent the leaf from drying out and promote root development.
- Position in a bright location: Place the pot in a bright location with indirect sunlight. Avoid direct sunlight, which can scorch the leaf.
- Monitor root development and humidity: Check the pot regularly for signs of root growth. It may take several weeks for roots to form. Gently mist the leaf occasionally to keep it moist.
- Pot up the new plant: Once roots have developed, you can carefully transfer the leaf cutting to a new pot with a well-draining potting mix. Bury the petiole about 1/2 inch deep in the potting mix.
Pros and Cons of Leaf Propagation
Pros
- One leaf can create multiple plants
- Great for damaged plants
- Fun experiment
Cons
- Slowest method
- Lower success rate
- Requires patience
Raindrop Peperomia Propagation Timeline
| Week | What to Expect |
|---|---|
| Week 1 | Cutting adjusts and calluses |
| Week 2-3 | Root development begins |
| Week 4-6 | Roots become established |
| Week 6-8 | New growth emerges |
| Week 8+ | Ready for potting up |
Propagation Problems
1. Stem cuttings not rooting
- Possible causes:
- Not enough humidity: Cuttings need high humidity to root properly. You can increase humidity by placing a plastic bag over the pot or by misting the cutting regularly.
- Not enough light: Cuttings need bright, indirect light to root. Avoid placing them in direct sunlight, which can scorch the leaves.
- Overwatering or underwatering: Overwatering a soil propagated plant can cause the stem to rot. Underwatering can prevent the stem from absorbing enough water to root. Water the cutting when the soil feels dry to the touch.
- Using the wrong potting mix: Use a well-draining potting mix
2. Leaf cuttings not rooting
- Possible causes:
- Not enough humidity: Leaf cuttings need even more humidity than stem cuttings. You can place the cutting in a terrarium or use a humidity dome.
- Not enough light: Leaf cuttings need bright, indirect light to root. Avoid placing them in direct sunlight, which can scorch the leaves.
- Underwatering: Leaf cuttings need to be kept moist at all times. Water the cutting when the soil feels slightly damp to the touch.
- Not enough node: Some leaf cuttings need to have a node to root. A node is the point where a leaf grows from the stem.
3. Rotting cuttings
- Possible causes:
- Overwatering: Overwatering is the most common cause of rotting cuttings. Water the cutting only when the soil feels dry to the touch.
- Using the wrong potting mix: Use a well-draining potting mix
- Not enough air circulation: Place the cutting in a pot with drainage holes and avoid placing it in a closed container that does not allow air circulation.
- Change water: When rooting cutting in water it’s important to change out the water ever few days.
4. Pests and diseases
- Possible causes:
- Using dirty tools: Always use clean, sanitized tools when taking cuttings. You can spread diseases between plants.
- Propagating from a diseased plant: Avoid propagating from plants that are showing signs of pests or diseases.
- Overcrowding: Overcrowding cuttings in the same pot can increase the risk of pests and diseases. Make sure your cuttings have enough space to breathe.
I’ve propagated several Raindrop Peperomia plants over the years and found that stem cuttings rooted in water consistently give me the highest success rate. I like being able to monitor root growth before transferring the cutting into soil. In my experience, warm temperatures and bright indirect light make the biggest difference in how quickly roots form.

Caring for Your Newly Propagated Raindrop Peperomia
Once your Raindrop Peperomia cutting has developed a healthy root system, it’s time to transition it into regular plant care. Fortunately, Peperomia polybotrya is one of the easiest houseplants to grow and maintain.
Place your newly rooted plant in bright, indirect light and allow the soil to partially dry between waterings. Avoid overwatering, as young plants are especially susceptible to root rot while they become established. A well-draining potting mix and a container with drainage holes will help encourage healthy root development.
During the growing season, you can fertilize lightly to encourage new growth. As your plant matures, you may also need to repot it into a slightly larger container to give the roots additional room to grow.
If you’d like more detailed care information, be sure to check out these helpful guides:
- Raindrop Peperomia Care Guide – Learn about lighting, watering, humidity, fertilizing, and troubleshooting common problems.
- Best Soil Mix for Peperomia Plants – Discover the ideal potting mix to prevent root rot and promote healthy growth.
- Complete Peperomia Care Guide – Everything you need to know about growing healthy Peperomia plants indoors.
- How to Propagate Watermelon Peperomia – Learn another fun and rewarding way to expand your Peperomia collection.
With the right care, your newly propagated Raindrop Peperomia can grow into a beautiful mature plant that you’ll enjoy for years to come.
Common Peperomia Issues to look out for
Peperomia plants are generally known for being relatively low-maintenance and pest-resistant. However, they are still susceptible to a few common pests and diseases. Here are some of the most common peperomia pests and issues to look out for:
Pests:
- Mealy bugs: Mealybugs are small, white insects that look like cotton balls. They feed on the sap of plants, which can cause them to become stunted and weak. Mealybugs can be controlled by rubbing them off with a cotton swab dipped in rubbing alcohol or by using a commercial insecticidal soap.
- Spider mites: Spider mites are tiny, eight-legged creatures that feed on the leaves of plants. They can cause the leaves to become yellow or brown and can also cause them to drop off. Spider mites can be controlled by increasing the humidity around the plant or by using a commercial insecticidal soap.
- Thrips: Thrips are tiny, slender insects that feed on the sap of plants. They can cause the leaves to become discolored and can also make them feel sticky. Thrips can be controlled by using a commercial insecticidal soap or by spraying the plant with a solution of neem oil.
Diseases:
- Root rot: Root rot is a fungal disease that affects the roots of plants. It is caused by overwatering or by using a potting mix that is not well-draining. Root rot can cause the leaves to become yellow or brown and can also cause them to drop off. Root rot can be controlled by using a well-draining potting mix and by watering the plant only when the soil feels dry to the touch.
- Fungal leaf spot: Fungal leaf spot is a fungal disease that causes brown spots to appear on the leaves of plants. It is caused by high humidity and poor air circulation. Fungal leaf spot can be controlled by increasing the air circulation around the plant and by avoiding overwatering.
- Powdery mildew: Powdery mildew is a fungal disease that causes a white powdery coating to appear on the leaves of plants. It is caused by high humidity and poor air circulation. Powdery mildew can be controlled by increasing the air circulation around the plant and by using a commercial fungicide.
Raindrop Peperomia FAQ’s
Can you propagate Raindrop Peperomia from a leaf?
Yes, though stem cuttings generally root faster and more reliably.
How long does Raindrop Peperomia propagation take?
Most cuttings develop roots within 2–6 weeks.
Is water or soil propagation better?
Both work well, but water propagation allows you to monitor root development.
When is the best time to propagate Raindrop Peperomia?
Spring and summer are ideal because the plant is actively growing.
Why is my Raindrop Peperomia cutting rotting?
Overwatering, poor air circulation, or contaminated water are common causes.
Now that you know how to grow and propagate Raindrop Peperomia you are ready to get started!
Posts that you may be interested in:
- How to Propagate Begonia Maculata
- Best Fertilizer for Bird of Paradise Plants
- Make your Own ZZ Plant Sil Mix
Happy Propagating!
I’d Love to Hear From You
Leave a comment below and share your experience. I read every comment and love hearing how other gardeners are building their dream indoor gardens.
And if you found this guide helpful, please consider sharing it on Pinterest, Facebook, or with a gardening friend. It helps support my content and allows me to continue creating honest, real-world gardening reviews based on products I actually use in my own garden.

The Thrifted Planter
Ciearra is a gardener and houseplant enthusiast of over 10 years! She has been growing indoors and outdoors. Supplying food for her family and beautifying her home with annuals, perennials and houseplants! Ciearra is passionate about sharing her knowledge of plant care with anyone who needs help or a quick plant growth tip! When she’s not blogging you can find her tending to her chickens, dogs and hanging out with her family
4 responses to “How to Propagate Raindrop Peperomia (3 Easy Methods)”
Leave a Reply
Nestera Chicken Coop

Botanical Interest
Garden Tower Project
Vego Gardens

Botanical Interests
Amazon Favorites!

Hoselink
Web Stories


[…] How to Propagate Peperomia Raindrop […]
[…] To read a FULL Raindrop Peperomia Propagation Guide Check out this post! […]
[…] How to Propagate Raindrop Pepperomia […]
[…] How to Propagate Raindrop Peperomia […]