How to Grow Garlic at Home (Complete Beginner’s Guide)
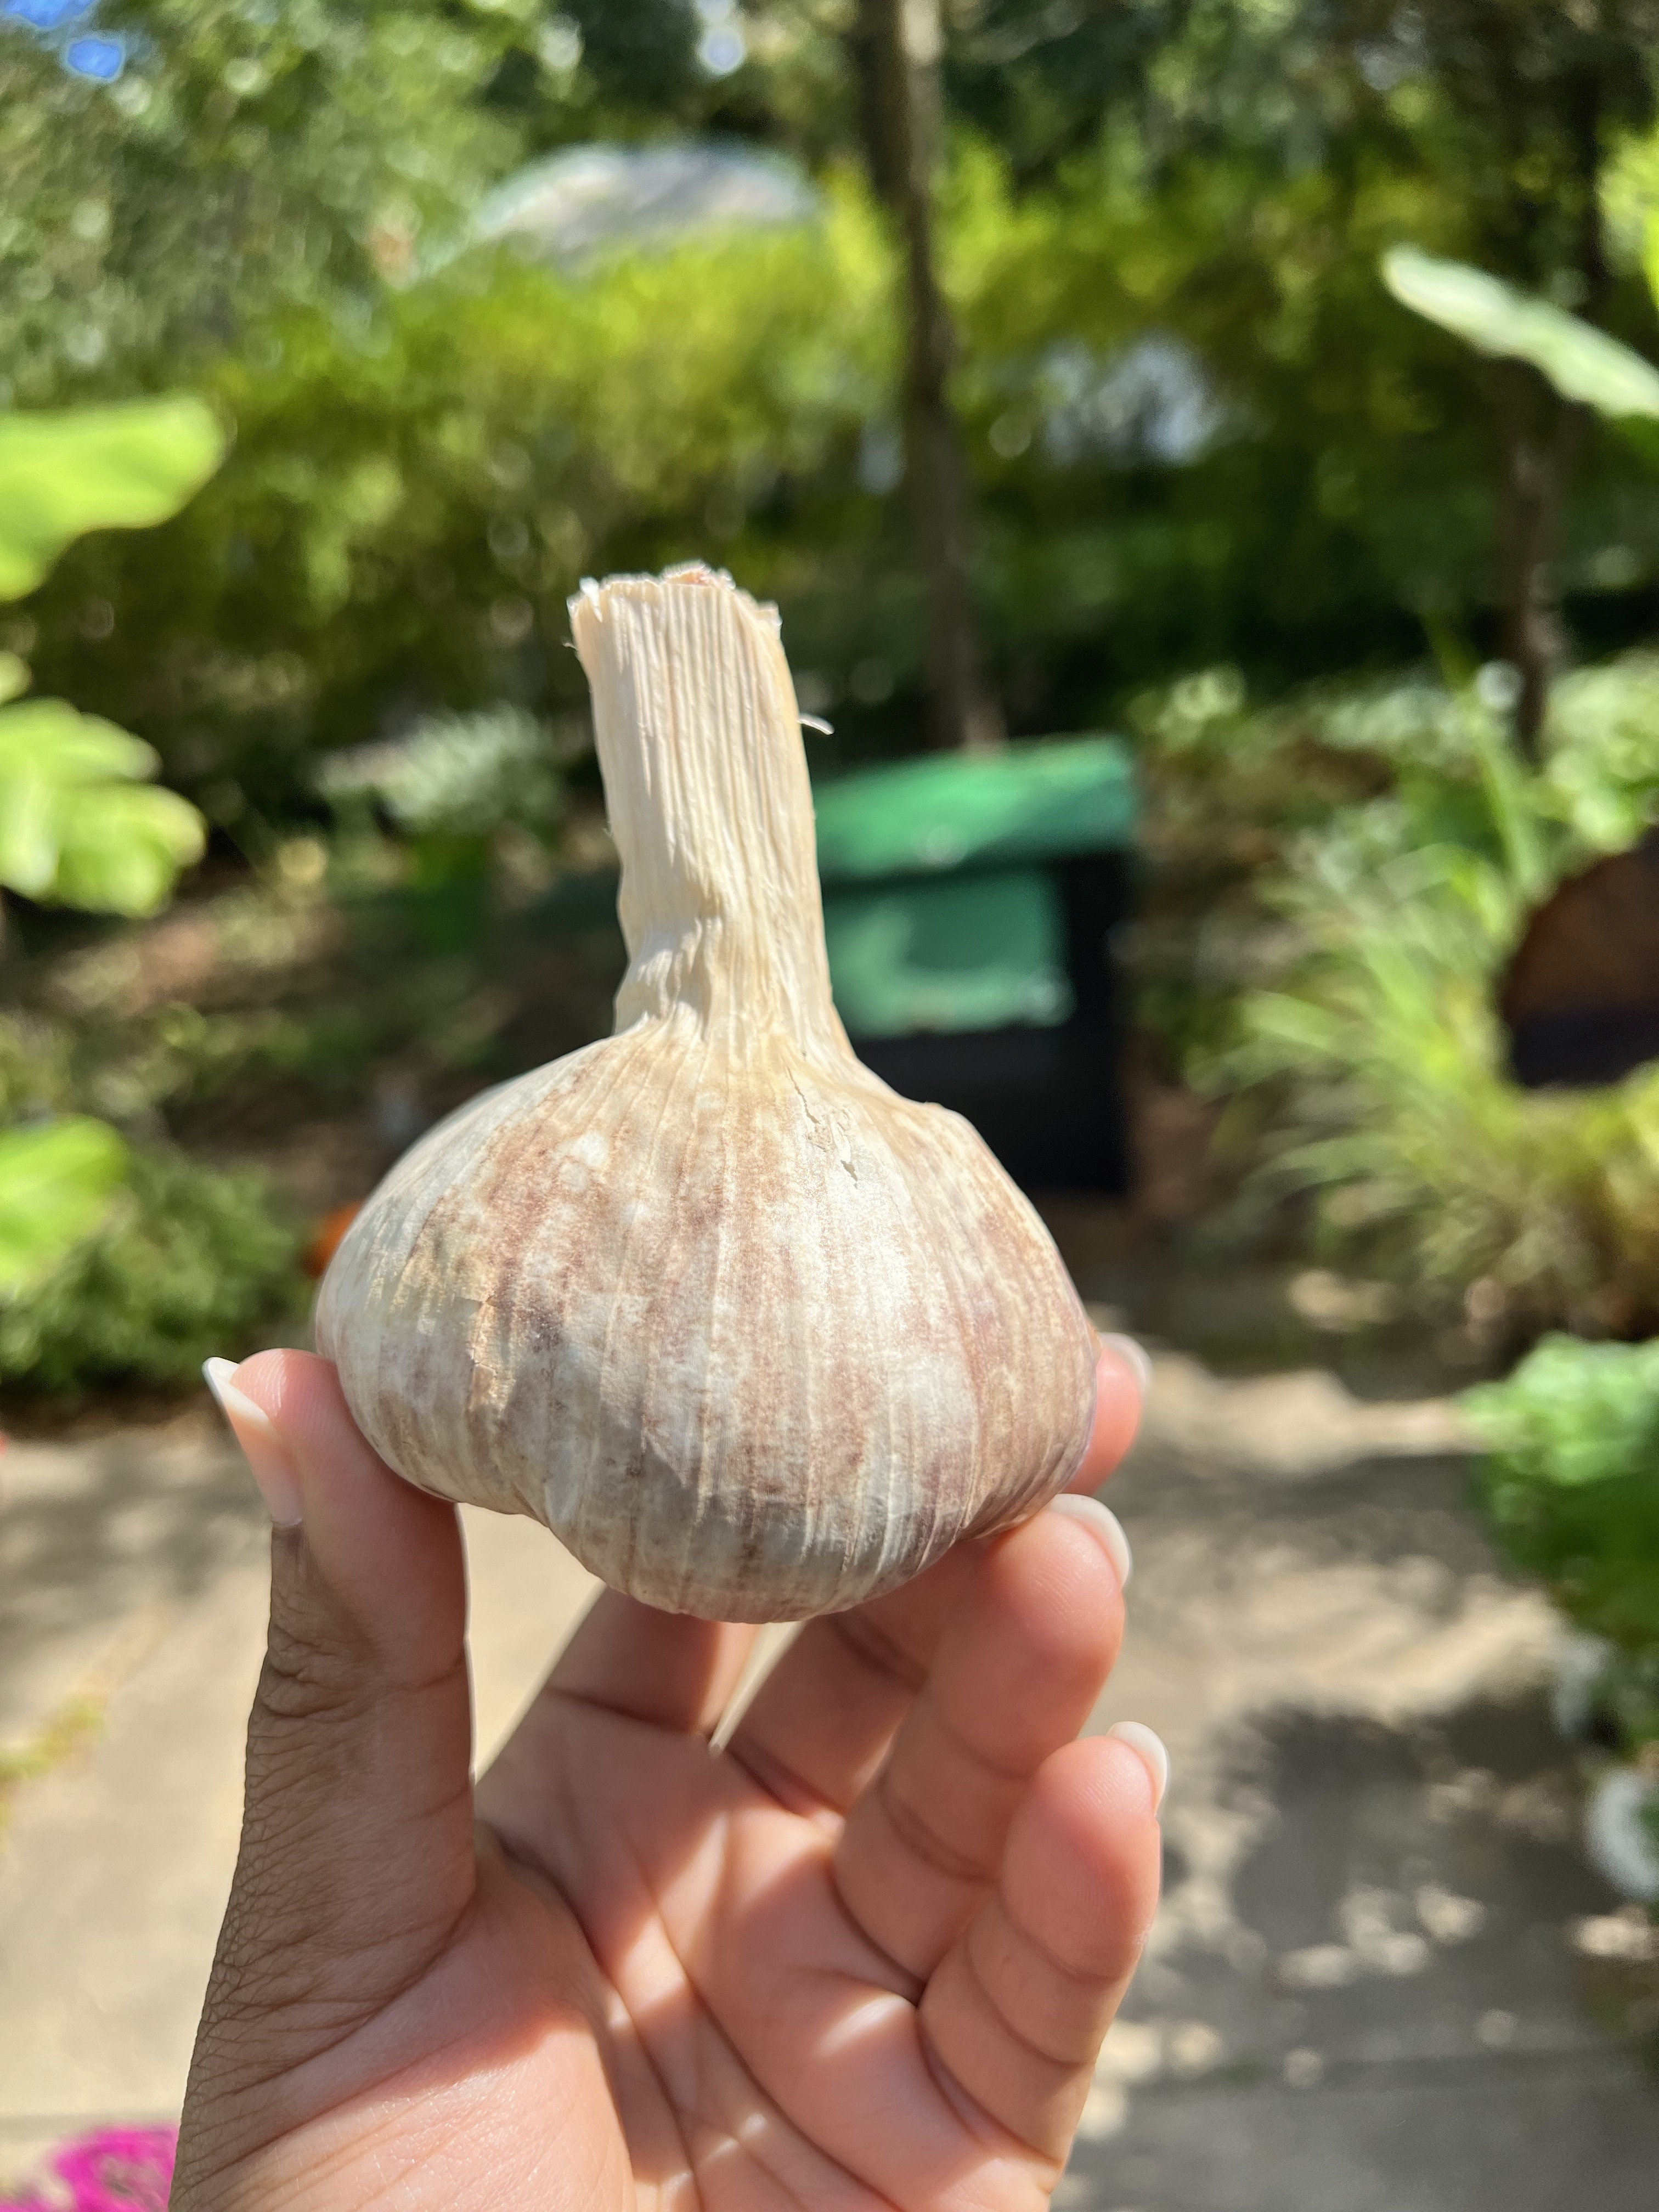
There’s nothing quite like harvesting your own garlic straight from the garden. Homegrown garlic is larger, fresher, and often much more flavorful than what you’ll find at the grocery store. Better yet, it’s one of the easiest crops you can grow. Once planted in the fall, garlic requires very little maintenance before rewarding you with beautiful bulbs the following summer.
Whether you’re planting garlic for the first time or looking to improve your harvest, this complete guide will walk you through every step of the process. You’ll learn when to plant garlic, how to choose the best varieties, prepare your soil, care for your plants throughout the growing season, harvest at the perfect time, and properly cure your bulbs for long-term storage.
The best part? Garlic grows well in raised beds, traditional garden rows, and even large containers. With the right growing conditions, a single clove can produce an entire bulb containing 8 to 20 new cloves, making garlic one of the most rewarding vegetables for home gardeners. Garlic performs best when planted in the fall, allowing its roots to establish before winter dormancy and produce larger bulbs the following summer.
If you’ve ever wondered how to grow garlic successfully, you’re in the right place. This guide covers everything you need to know from planting your first clove to enjoying your own homegrown garlic in the kitchen.
This blog post may contain affiliate links. I may earn a small commission to fund my houseplant habit if you use these links to make a purchase. You will not be charged extra, and you’ll keep me in the garden. It’s a win for everyone, really.
Quick Answer: How to Grow Garlic
Growing garlic is easy when you plant it at the right time and give it the proper growing conditions. Plant individual garlic cloves in the fall, about 4 to 6 weeks before the ground freezes, in a location that receives at least 6 to 8 hours of direct sunlight each day. Space cloves 4 to 6 inches apart in loose, well-drained soil with the pointed end facing upward. Cover the cloves with 2 inches of soil, then apply a 2- to 4-inch layer of mulch to protect them over winter.
In spring, keep the soil evenly moist, fertilize with a nitrogen-rich fertilizer as new growth begins, and remove garlic scapes from hardneck varieties to encourage larger bulbs. Most garlic is ready to harvest in mid to late summer, when the lower leaves turn brown while several upper leaves remain green.

Growing Garlic: A Complete Guide for Beginners
| Feature | Recommendation |
|---|---|
| Botanical Name | Allium sativum |
| Plant Type | Bulb vegetable |
| Planting Time | Fall (4–6 weeks before the ground freezes) |
| Sunlight | Full sun (6–8+ hours daily) |
| Soil | Loose, fertile, well-drained soil |
| Soil pH | 6.0–7.0 |
| Spacing | 4–6 inches between cloves |
| Planting Depth | 2–3 inches |
| Water Needs | About 1 inch per week during active growth |
| Mulch | 2–4 inches of straw or shredded leaves |
| Fertilizer | Nitrogen-rich fertilizer in early spring |
| Harvest Time | Mid to late summer |
| Difficulty | Easy |
| Best Growing Zones | USDA Zones 3–9 (timing varies by climate) |
How to grow Garlic
Types of Garlic
Before you plant your first garlic cloves, it’s important to choose the right type of garlic for your garden. While all garlic belongs to the Allium family, there are three main types you’ll encounter: hardneck garlic, softneck garlic, and elephant garlic. Each has different growing habits, flavors, and storage qualities.
Choosing the right variety for your climate and cooking preferences can make a big difference in your harvest.
Hardneck Garlic
Hardneck garlic (Allium sativum var. ophioscorodon) is a favorite among home gardeners because of its rich flavor and large, easy-to-peel cloves. It produces a stiff central stalk, or “neck,” which gives this type of garlic its name.
One of the biggest advantages of growing hardneck garlic is that it produces garlic scapes in late spring or early summer. These curly flower stalks are edible and have a mild garlic flavor that’s delicious in pesto, stir-fries, soups, and roasted vegetable dishes.
Hardneck garlic thrives in regions with cold winters because it needs a period of freezing temperatures to develop large bulbs. It’s an excellent choice for gardeners in USDA Zones 3 through 7, making it ideal for many northern and Midwestern states.
Pros:
- Rich, complex garlic flavor
- Large cloves that are easy to peel
- Produces edible garlic scapes
- Excellent cold tolerance
Cons:
- Shorter storage life (typically 4 to 6 months)
- Fewer cloves per bulb than softneck garlic
Softneck Garlic
Softneck garlic (Allium sativum var. sativum) is the type most commonly found in grocery stores. Unlike hardneck varieties, it does not produce a flowering stalk, allowing the plant to put more energy into developing the bulb.
Softneck garlic typically produces more cloves per bulb, although the individual cloves are usually smaller. Its biggest advantage is its excellent storage life many varieties can last 8 to 12 months when properly cured and stored.
Gardeners in warmer climates often have the best success with softneck garlic because it requires less winter chilling than hardneck varieties. The flexible stems also make it perfect for creating beautiful braided garlic for storage or decoration.
Pros:
- Long storage life
- Produces many cloves per bulb
- Great for braiding
- Performs well in mild winter climates
Cons:
- Smaller cloves
- Does not produce garlic scapes
- Flavor is often milder than hardneck varieties
Elephant Garlic
Despite its name, elephant garlic isn’t actually true garlic. It’s more closely related to leeks, but it’s grown much like garlic and produces impressively large bulbs with giant cloves.
Elephant garlic has a much milder flavor than traditional garlic, making it a great choice for roasting whole or using in recipes where you want a subtle garlic taste without overwhelming the dish.
Because the bulbs can grow to several inches across, be sure to provide plenty of space between plants. Elephant garlic also benefits from fertile, well-drained soil and consistent watering throughout the growing season.
Pros:
- Produces enormous bulbs and cloves
- Mild, sweet garlic flavor
- Easy to peel
- Excellent for roasting
Cons:
- Not true garlic
- Milder flavor than hardneck or softneck varieties
- Requires more garden space
Which Type of Garlic Should You Grow?
For most home gardeners, the best choice depends on where you live and how you plan to use your garlic.
| If you want… | Choose… |
|---|---|
| The best flavor | Hardneck garlic |
| Long-term storage | Softneck garlic |
| Garlic scapes | Hardneck garlic |
| Easy-to-peel cloves | Hardneck garlic |
| Large harvests with many cloves | Softneck garlic |
| Giant bulbs for roasting | Elephant garlic |
| Cold climate performance | Hardneck garlic |
| Warm climate performance | Softneck garlic |
My Recommendation
If you’re gardening in Ohio or another cold-winter climate, I recommend planting hardneck garlic. It consistently performs well in colder regions, produces flavorful bulbs, and gives you the bonus harvest of garlic scapes in early summer.
If you live in a warmer southern climate, softneck garlic is usually the better option because it stores longer and grows well with less winter chilling.
No matter which type you choose, planting high-quality seed garlic in the fall will give you the best chance of harvesting large, healthy bulbs the following summer.
Best Garlic Varieties to Grow
Not all garlic varieties are the same. Some produce larger bulbs, others store longer, and certain varieties are better suited for cold or warm climates. Choosing the right variety for your growing conditions is one of the easiest ways to improve your harvest.
Popular Hardneck Varieties
Hardneck garlic is known for its exceptional flavor and cold hardiness.
Music Garlic
- Large bulbs with 4–6 jumbo cloves
- Rich, spicy flavor that mellows when cooked
- Excellent choice for northern gardens
- Stores for about 5–6 months
German Extra Hardy
- Reliable producer in cold climates
- Strong, classic garlic flavor
- Large cloves that are easy to peel
- One of the most popular varieties for home gardeners
Chesnok Red
- Purple-striped garlic with outstanding flavor
- Holds its flavor well when roasted
- Great for baking and gourmet cooking
Spanish Roja
- Rich, robust garlic flavor
- Produces beautiful purple bulbs
- Excellent for fresh eating and roasting
Popular Softneck Varieties
Softneck garlic stores longer than hardneck varieties and performs well in milder climates.
California Early
- Easy to grow
- Mild flavor
- Excellent storage life
- Great for beginners
California Late
- Produces high yields
- Stores up to a year when properly cured
- Commonly grown commercially
Inchelium Red
- Mild, buttery flavor
- Large bulbs with many cloves
- One of the best softneck varieties for home gardens
Which Variety Should You Choose?
If you’re gardening in Ohio or another cold climate, varieties like Music, German Extra Hardy, and Chesnok Red are excellent choices because they tolerate freezing winters and produce large, flavorful bulbs.
Gardeners in warmer climates often have better success with California Early, California Late, or Inchelium Red, which require less winter chilling.
When to Plant Garlic
One of the biggest secrets to growing large garlic bulbs is planting at the right time. Garlic should almost always be planted in the fall, giving the cloves time to establish roots before winter dormancy.
A good rule of thumb is to plant garlic 4 to 6 weeks before your ground freezes. During this time, the cloves develop a strong root system without producing much top growth. Once temperatures warm in spring, the plants resume growing and begin forming bulbs.
Garlic Planting Times by USDA Zone
| USDA Zone | Best Planting Time |
|---|---|
| Zones 3–4 | Mid-September to Early October |
| Zones 5–6 | Late September to Mid-October |
| Zones 7–8 | October through November |
| Zones 9–10 | Late October through December |
For gardeners in Ohio (Zone 6), the ideal planting window is usually late September through mid-October.
Can You Plant Garlic in the Spring?
Yes, but fall planting almost always produces larger bulbs.
Spring-planted garlic doesn’t receive the same period of cold exposure (called vernalization) that fall-planted garlic does. Without enough chilling, the cloves often produce smaller bulbs with fewer cloves.
If you miss fall planting, you can still grow garlic in spring by planting as soon as the soil can be worked, but expect a smaller harvest.
Can You Plant Grocery Store Garlic?
Many gardeners wonder if they can simply plant garlic from the grocery store. While it’s possible, it’s usually not the best option.
Most grocery store garlic is grown for eating—not planting. It may have been treated to prevent sprouting, and imported bulbs can carry diseases that may affect your garden. Some varieties are also poorly adapted to your local climate.
For the healthiest plants and the largest bulbs, purchase certified seed garlic from a reputable garden center, seed company, or local garlic grower.
Seed garlic is selected specifically for planting and is often larger, healthier, and better suited for your growing region.
If you decide to experiment with grocery store garlic, choose firm bulbs that haven’t been treated, avoid imported garlic whenever possible, and separate the cloves just before planting.
Choosing Seed Garlic
The quality of your seed garlic directly affects the size and health of your harvest. Larger cloves generally produce larger bulbs, while small cloves often grow into smaller heads of garlic.
When shopping for seed garlic, look for bulbs that are:
- Firm and heavy for their size
- Free of mold or soft spots
- Undamaged
- Adapted to your growing region
- Certified disease-free whenever possible
Avoid planting cloves that are shriveled, damaged, or beginning to rot.
When it’s time to plant, gently separate the bulb into individual cloves, but leave the papery skins intact. The protective wrapper helps reduce moisture loss and protects the developing clove from disease after planting.
How Much Seed Garlic Do You Need?
A good estimate is:
| Garden Size | Approximate Seed Garlic Needed |
|---|---|
| 10-foot row | 20–30 cloves |
| 4′ × 4′ raised bed | 30–40 cloves |
| 4′ × 8′ raised bed | 60–80 cloves |
| Family supply for one year | 50–100 cloves (depending on use) |
Buying a little extra seed garlic is always a good idea. You can plant the largest cloves for next year’s crop and enjoy the smaller ones in the kitchen.

Where to Plant Garlic
Choosing the right location is one of the most important factors in growing large, healthy garlic bulbs. Garlic grows best in a sunny location that receives at least 6 to 8 hours of direct sunlight each day. The more sunlight your plants receive, the larger the bulbs are likely to become.
Good drainage is equally important. Garlic doesn’t tolerate soggy soil, especially during the winter months when excess moisture can cause cloves to rot before they have a chance to grow. If your garden has heavy clay soil or tends to stay wet after rain, consider planting garlic in raised beds or mounded rows to improve drainage.
Garlic can be grown in:
- Raised garden beds
- Traditional in-ground gardens
- Large containers or grow bags
- Square foot gardens
Avoid planting garlic in low-lying areas where water collects after heavy rains.
Best Soil for Garlic
Garlic thrives in loose, fertile, well-drained soil that allows bulbs to expand easily underground. Heavy, compacted soil often produces smaller bulbs and can increase the risk of rot.
Before planting, work plenty of compost or well-aged manure into the soil to improve drainage and add organic matter. Garlic grows best in soil with a pH between 6.0 and 7.0, which is slightly acidic to neutral.
For the best results:
- Add 2 to 3 inches of compost before planting.
- Remove rocks and large clumps of soil.
- Avoid fresh manure, which can encourage disease and excessive leaf growth.
- If needed, amend heavy clay soil with compost to improve drainage.
Healthy soil is the foundation for producing large, flavorful garlic bulbs.
Choosing Seed Garlic
For the healthiest plants and largest harvest, purchase seed garlic from a reputable garden center, seed company, or local garlic grower. Seed garlic is specifically grown for planting and is usually free from diseases that can affect your crop.
When selecting seed garlic, choose large, firm bulbs with no signs of mold, soft spots, or damage. Larger cloves generally produce larger bulbs, so save the biggest cloves for planting and use the smaller ones in the kitchen.
You can often choose between:
- Hardneck garlic
- Softneck garlic
- Elephant garlic (which is actually more closely related to leeks than true garlic)
Select varieties that perform well in your growing zone for the best results.
Can You Plant Grocery Store Garlic?
Technically, yes—but it’s usually not recommended.
Many grocery store garlic bulbs have been treated to prevent sprouting during storage. Some are imported from climates very different from your own and may not be well adapted to your growing conditions. Grocery store garlic can also carry diseases that may spread to your garden.
If you do decide to plant grocery store garlic, choose firm, healthy bulbs that haven’t been refrigerated for long periods and haven’t been treated with sprout inhibitors.
For consistently larger harvests, disease-resistant plants, and better flavor, seed garlic remains the best choice.
How to Plant Garlic
Plant garlic in the fall about 4 to 6 weeks before the ground freezes. This gives the cloves enough time to develop roots before winter without producing too much top growth.
Follow these simple steps:
- Separate the garlic bulb into individual cloves just before planting.
- Leave the papery skins intact.
- Plant only the largest cloves.
- Place each clove with the pointed end facing upward.
- Plant cloves 2 to 3 inches deep.
- Space cloves 4 to 6 inches apart.
- Leave 10 to 12 inches between rows.
- Cover with soil and water thoroughly.
- Apply a 2 to 4-inch layer of mulch after planting.
Within a few weeks, roots will begin to develop underground before the plants go dormant for winter.

Growing Garlic in Raised Beds
Raised beds are one of the easiest and most productive ways to grow garlic. Because the soil drains more quickly than traditional garden beds, garlic is less likely to develop rot during wet winters.
Raised beds also warm up earlier in the spring, allowing garlic to begin growing sooner.
When planting garlic in raised beds:
- Use a rich, well-draining soil mix.
- Space cloves 4 to 6 inches apart.
- Mulch heavily after planting.
- Water consistently during dry periods.
If you grow vegetables in raised beds, garlic fits nicely alongside onions, carrots, lettuce, spinach, and many leafy greens.
Growing Garlic in Containers
Don’t have a garden? Garlic grows surprisingly well in containers.
Choose a container that’s at least 10 to 12 inches deep with plenty of drainage holes. Fill it with high-quality potting mix blended with compost rather than using garden soil.
Plant cloves just as you would in the ground:
- 2 to 3 inches deep
- 4 to 6 inches apart
- Pointed end facing up
Container-grown garlic dries out faster than garden beds, so monitor soil moisture throughout the growing season. During winter, move containers to a protected location if extremely cold temperatures are expected.
Caring for Garlic Throughout the Growing Season
Once garlic begins actively growing in spring, it requires very little maintenance. The key is providing consistent moisture, controlling weeds, and keeping plants healthy until harvest.
Avoid allowing weeds to compete with garlic since the plants have relatively shallow root systems.
Check plants regularly for pests or signs of disease and remove any damaged foliage promptly.
With proper care, garlic will continue producing lush green leaves throughout spring before bulbs begin swelling in early summer.
Watering Garlic
Garlic prefers consistently moist but never soggy soil.
Aim to provide about 1 inch of water per week, either from rainfall or irrigation. During periods of hot, dry weather, you may need to water more frequently.
As harvest time approaches, reduce watering. Stop watering entirely about two weeks before harvest to allow the bulbs to begin drying and improve storage life.
Avoid overhead watering whenever possible, as wet foliage can encourage fungal diseases.
Fertilizing Garlic
Garlic is a heavy feeder and benefits from additional nutrients during the growing season.
As new growth begins in early spring, apply a nitrogen-rich fertilizer, such as blood meal, fish emulsion, feather meal, or a balanced organic vegetable fertilizer. Nitrogen encourages vigorous leaf growth, which directly supports larger bulb development.
You can fertilize again about four to six weeks later if plant growth appears slow or the soil is less fertile.
Once garlic begins forming bulbs in late spring or early summer, stop applying high-nitrogen fertilizers. At this stage, the plant should focus its energy on bulb development rather than producing more leaves.
Mulching Garlic
Mulch is one of the easiest ways to improve your garlic harvest.
After planting in the fall, apply a 2 to 4-inch layer of organic mulch, such as:
- Straw
- Shredded leaves
- Pine straw
- Weed-free hay
Mulch helps:
- Insulate the soil during winter
- Reduce weed growth
- Retain soil moisture
- Prevent frost heaving
- Keep bulbs cleaner at harvest
Leave most of the mulch in place throughout spring and early summer, adding more if it begins to break down or thin out. A consistent mulch layer reduces maintenance and creates ideal growing conditions for healthy garlic plants.

Garlic Scapes: Should You Remove Them?
If you’re growing hardneck garlic, you’ll notice a long, curly green stem emerging from the center of the plant in late spring or early summer. This flowering stalk is called a garlic scape.
While garlic scapes are edible and delicious, they also require energy to produce. If left on the plant, some of that energy is diverted away from bulb development. For the largest garlic bulbs, it’s best to remove the scapes once they’ve made one full curl.
Simply cut or snap the scape near the top of the leaves without damaging the rest of the plant.
Don’t throw them away! Garlic scapes have a mild garlic flavor and can be:
- Made into pesto
- Stir-fried with vegetables
- Chopped into soups
- Added to scrambled eggs
- Grilled whole
- Blended into compound butter
Removing scapes can help your garlic plants produce larger bulbs while giving you an extra early-season harvest.
Need more tips for your Garlic Scapes? Check out this post!

Common Garlic Growing Problems
Garlic is one of the easiest vegetables to grow, but like any crop, it can occasionally run into problems. Catching issues early will help you enjoy a healthier harvest.
Small Bulbs
Small garlic bulbs are usually caused by planting cloves that were too small, overcrowding plants, poor soil, insufficient sunlight, or harvesting too early.
Solution: Plant the largest cloves, provide full sun, fertilize in spring, and allow bulbs to fully mature before harvesting.
Yellow Leaves
Some yellowing is completely normal as garlic approaches harvest. However, yellow leaves early in the season may indicate poor drainage, nutrient deficiencies, drought stress, or disease.
Solution: Improve soil drainage, water consistently, and fertilize with a nitrogen-rich fertilizer during spring growth.
Bulb Rot
Garlic planted in poorly drained soil can develop bulb rot, especially during wet winters.
Solution: Plant in raised beds or well-draining soil and avoid overwatering.
Rust
Garlic rust appears as small orange or yellow spots on the leaves.
Solution: Remove infected foliage, improve air circulation, avoid overhead watering, and rotate crops each year.
Onion Thrips
These tiny insects feed on garlic leaves, causing silvery streaks and reduced plant vigor.
Solution: Inspect plants regularly and use insecticidal soap or encourage beneficial insects if populations become severe.
Weeds
Garlic doesn’t compete well with weeds because of its shallow root system.
Solution: Keep beds weed-free by hand-pulling weeds and maintaining a thick layer of mulch.

When to Harvest Garlic
Knowing when to harvest is one of the most important parts of growing garlic. Harvest too early, and the bulbs will be small. Wait too long, and the bulbs may split apart, reducing their storage life.
Most garlic is ready to harvest in mid to late summer, depending on your climate and the variety you’re growing.
Look for these signs:
- The bottom three to five leaves have turned brown.
- Several upper leaves remain green.
- The bulbs feel firm beneath the soil.
Use a garden fork to gently loosen the soil before lifting the bulbs. Avoid pulling garlic by the stems, as this can damage both the stalk and the bulb.
How to Cure Garlic
Freshly harvested garlic needs to cure before it’s ready for long-term storage.
Curing allows the outer wrappers to dry and protects the bulbs from mold and rot.
To cure garlic:
- Gently brush off excess soil.
- Do not wash the bulbs.
- Leave the roots and stalks attached.
- Hang bundles or lay bulbs on a screen in a warm, dry, well-ventilated location out of direct sunlight.
- Allow garlic to cure for 2 to 4 weeks.
Once cured, trim the roots to about ¼ inch and cut the stalks, leaving about an inch above the bulb.
How to Store Garlic
Properly cured garlic can last for several months when stored correctly.
Store garlic in:
- Mesh bags
- Wire baskets
- Paper bags
- Hanging garlic braids (softneck varieties)
Choose a cool, dry, well-ventilated location away from direct sunlight.
Avoid storing garlic in the refrigerator, where excess humidity may encourage sprouting.
Under ideal conditions, hardneck garlic typically stores for 4 to 6 months, while softneck varieties can often last 6 to 9 months.
Best Companion Plants for Garlic
Garlic is more than just a delicious crop it also makes an excellent companion plant. Its strong scent can help discourage certain garden pests while taking up very little space.
Great companion plants include:
- Tomatoes
- Peppers
- Carrots
- Beets
- Spinach
- Lettuce
- Kale
- Cabbage
- Broccoli
- Cauliflower
- Strawberries
- Fruit trees
- Roses
Many gardeners also plant garlic around ornamental beds because its scent may help deter browsing deer and rabbits.
Plants to Avoid Growing Near Garlic
Although garlic grows well alongside many vegetables, a few crops are better planted elsewhere.
Avoid planting garlic next to:
- Beans
- Peas
- Lentils
- Asparagus
- Sage
Legumes are thought to grow less vigorously when planted close to members of the onion family, and asparagus can compete for nutrients in the soil.
When planning your vegetable garden, rotate garlic to a different bed every year to reduce the risk of diseases building up in the soil.

Frequently Asked Questions
How long does garlic take to grow?
Garlic usually takes 8 to 9 months from planting to harvest. Most gardeners plant garlic in the fall and harvest it the following summer.
Can I grow garlic in pots?
Yes! Garlic grows very well in containers that are at least 10 to 12 inches deep and have excellent drainage. Use a high-quality potting mix, water consistently, and place the container in full sun.
Does garlic come back every year?
Garlic is typically grown as an annual crop. If bulbs are left in the ground, some cloves may sprout again the following year, but intentionally replanting fresh cloves each fall produces the best harvest.
How many bulbs does one clove produce?
Each healthy garlic clove grows into one complete garlic bulb containing multiple new cloves.
Why didn’t my garlic form bulbs?
Poor bulb development is usually caused by planting too late, insufficient sunlight, overcrowding, poor soil, lack of nutrients, or harvesting before the bulbs have fully matured.
For Tips on what to do with all of your garlic check out this post!
My Final Thoughts
Garlic is one of the easiest and most rewarding vegetables you can grow in your home garden. With just a little planning in the fall, you’ll enjoy fresh, flavorful bulbs the following summer that taste far better than most store-bought garlic.
Whether you’re growing hardneck or softneck varieties, the keys to success are simple: plant quality seed garlic, choose a sunny location with well-drained soil, keep the beds weed-free, and be patient while the bulbs mature. A little care throughout the growing season will reward you with an abundant harvest that’s perfect for cooking, preserving, and even planting again next fall.
If this is your first time growing garlic, don’t overthink it. Garlic is incredibly forgiving, making it an excellent crop for beginners and experienced gardeners alike. Once you’ve harvested your first homegrown bulbs, there’s a good chance you’ll make garlic a permanent part of your garden every year.
Happy Gardening
Want To Learn More?
IF YOU LIKE THIS POST
You might also like these:
We’d love to hang out with you on our social channels. You can subscribe to our blog and find us on Facebook, Youtube, Instagram and Pinterest! Feel free to reach out if you have any plant questions!
Affiliate Disclosure: This post may contain affiliate links. If you make a purchase through one of these links, I may earn a small commission at no additional cost to you. I only recommend products I personally use, trust, or believe will bring value to my readers. Thank you for supporting The Thrifted Planter!

The Thrifted Planter
Ciearra is a gardener and houseplant enthusiast of over 10 years! She has been growing indoors and outdoors. Supplying food for her family and beautifying her home with annuals, perennials and houseplants! Ciearra is passionate about sharing her knowledge of plant care with anyone who needs help or a quick plant growth tip! When she’s not blogging you can find her tending to her chickens, dogs and hanging out with her family
2 responses to “How to Grow Garlic at Home (Complete Beginner’s Guide)”
Leave a Reply
Nestera Chicken Coop

Botanical Interest
Garden Tower Project
Vego Gardens

Botanical Interests
Amazon Favorites!

Hoselink
Web Stories


[…] can be easily grown in small spaces! Read this post to learn how to grow […]
[…] improve digestion, and fight off seasonal colds. Packed with fiery ingredients like horseradish, garlic, onion, ginger, and hot peppers steeped in apple cider vinegar, fire cider is as potent as its name […]